For this month’s Stampin’ for Christmas blog hop, I thought i would have fun making Christmas cards with non-Christmas Stamps.
My Project
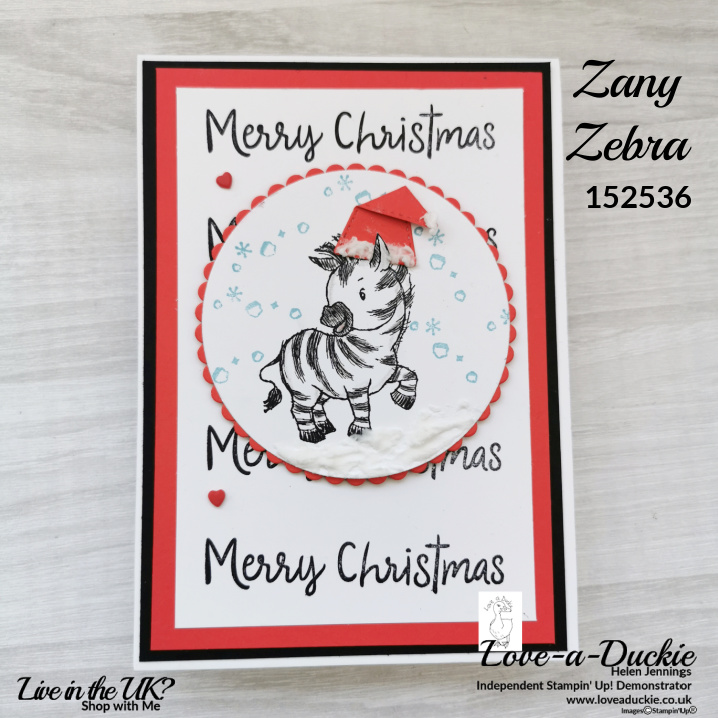
Zebras are not well known for their connections to Christmas, but I thought it would be fun to use the Zany Zebras stamp set and get festive.
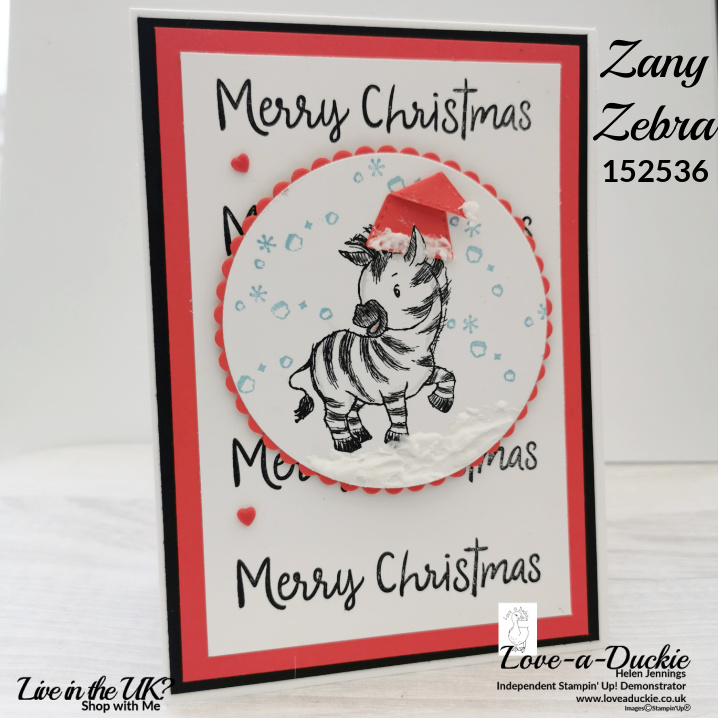
- Stamps: Zany Zebras, Snowman Season
- Tools: Stamparatus, Layering Circles Dies, Stitched Triangles Dies.
- Paper/Card: Thick basic White; Basic Black, Poppy Parade, Basic White
- Ink: Tuxedo Black Memento, Balmy Blue, Watercolor Pencils
- Embellishments: Embossing Paste, Resin Hearts
- Adhesives; Multipurpose Liquid Glue; Stampin’ Dimensionals
| A4 Metric | Imperial Letter Size | |
| Thick Basic White Card Base | 10.5cm x 29.7cm Scored at 14.9cm on long side | 4 1/4″ x 11″ Scored at 5 1/2″ on long side |
| Basic Black | 14.4cm x 10cm | 5 1/4″ x 4″ |
| Poppy Parade | 13.9cm x 9.5cm | 5″ x 3 3/4″ |
| Basic White | 12.9cm x 8.5cm plus for Circle Die | 4 1/2″ x 3 1/4″ plus for Circle Die |
Instructions
- Fold your card base along the score line. Stick the Basic Black mat to the card base.
- Cut the large scalloped circle and a small stitched triangle from the centre of the Poppy Parade card stock, before sticking the mat of card to the card front.
- Using the Stamparatus and the hinge method, stamp the “Merry Christmas” greeting down the length of the Basic White mat, using the Memento ink.
- Stick this mat to the card base.
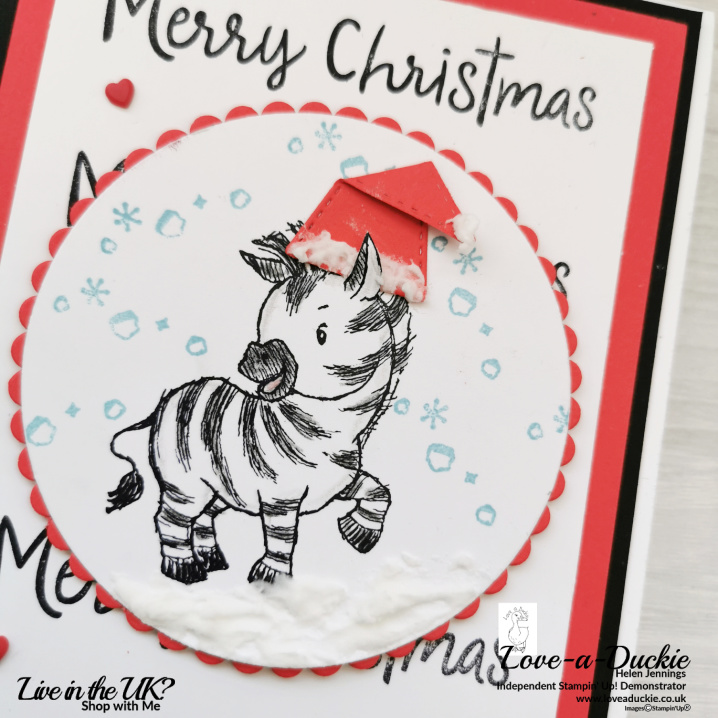
- On a large die cut circle and again using the Stamparatus, stamp the Zebra using Memento ink. Repeat stamping until you are happy with the strength of colour. Use the little snow stamp from the Snowman Season set and Balmy Blue ink to add snow around the Zebra. Use watercolour pencils to add a bit more shading to the Zebra.
- Take your small stitched triangle and fold the top down. Stick it down with a mini dimensional. Add some embossing paste to the bottom and tip of your “hat”. Trim around the Zebra’s ear slightly with a craft knife so you can slot the hat in and stick it in place. Add some more embossing paste on the bottom of the circle, under the Zebra’s feet.
- Stick this circle to the scalloped circle and then attach to the card front.
- Finish with some Resin Hearts.
Let’s Hop
I hope you have enjoyed my project. Do leave a comment if you can, because it certainly makes my day. Then it is time to hop around all the other projects

March Blog Hop Roll Call
Helen Jennings – You are here
How Can I Help?
You may not feel ready to tackle Christmas cards yet, but I hope you will save this card for when you start your Christmas Crafting. It also shows that you don’t only have to only use your traditional “Christmas” stamp sets for your Christmas projects.
Stay safe, stay well
Helen xx
If you live in the UK, I would love you to choose me as your demonstrator.
- You can shop here or click on the images listed below.
- sign up for my newsletter to receive news and inspiration
- Find out more about joining my team to get a 20% discount on your craft supplies
- email me if I can be of any assistance.
- Make sure you use the current host code so I can thank you for your order.
- Anyone purchasing from me will receive a Tutorial Bundle as a Thank You.






love your card – made me smile seeing your Zebra x
Wow, such a clever idea ! Love your card!!
Ah, very cute! Great card!
What an awesome idea! Love it.
Love the zebra with a Santa hat! So cute!
Such a fun card!! I love it ?
Love what you have done x
SOOOOO Frinkin Cute! Zebra santa what a cute idea, thanks for sharing
This is adorable!!
Such a cute Christmas Card x