For today’s projects I have been playing with the new Basic Borders Dies to create some fancy shaped gate fold cards. These have been decorated with 2021-2023 In Colors to fit the theme for this latest Creativity Abounds Blog Hop and the new Tutorial Bundle that is now available to purchase.
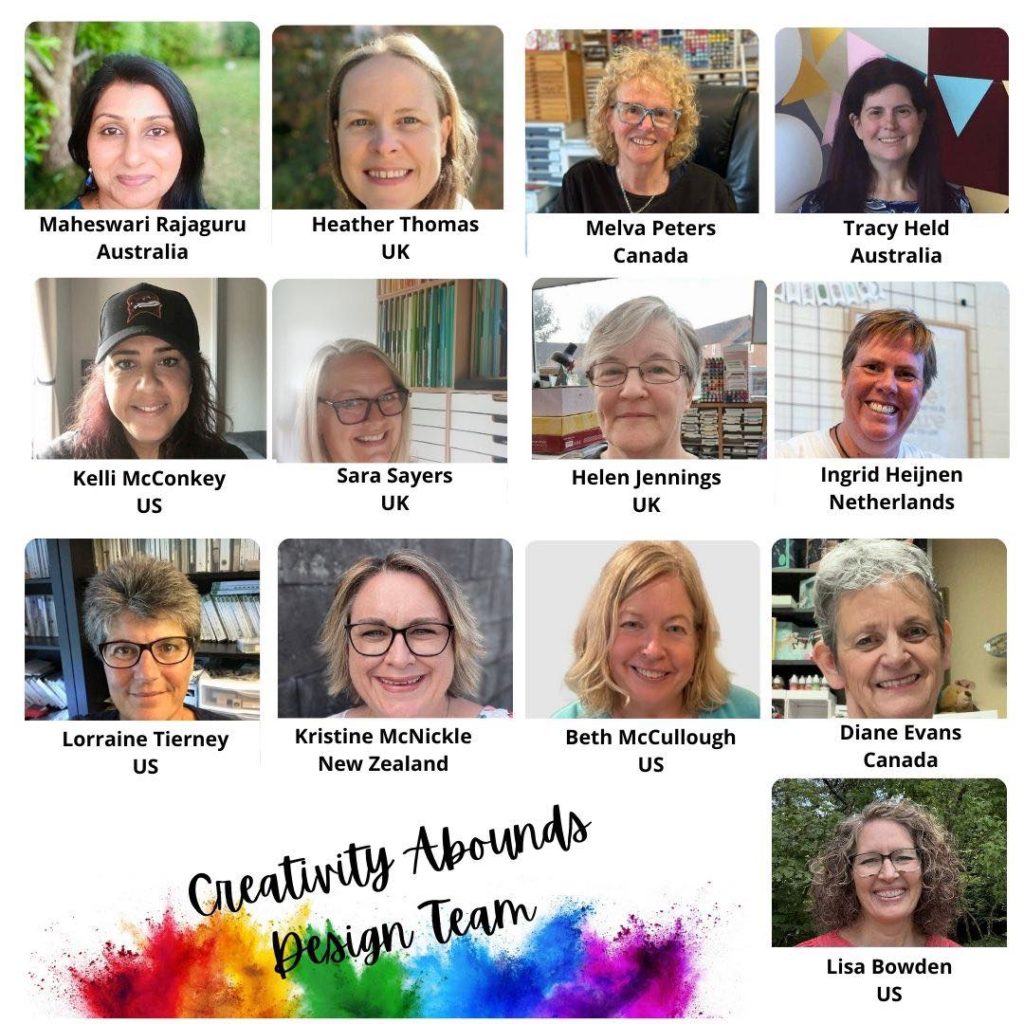
The Creativity Abounds Design Team are a group of very keen Stampin’ Up!® Demonstrators from all around the world that are coming together to share our creative ideas with you. We are happy that you can join us and hope that we can Inspire you to make creations of your own.
You may be starting here or have come from someone else’s blog – either way there is a list at the end of this post to help you move around all the different blogs and get many amazing ideas. We all have our country listed – so if you are looking for a demonstrator in your country, then these demonstrators would love to look after you with your Stampin’ Up!® shopping or if you would like to join our Stampin’ Up!® teams.
These monthly blog hops also introduce you to our latest Tutorial Bundle containing lots of different inspiring projects.
My Shaped Gate Fold Cards
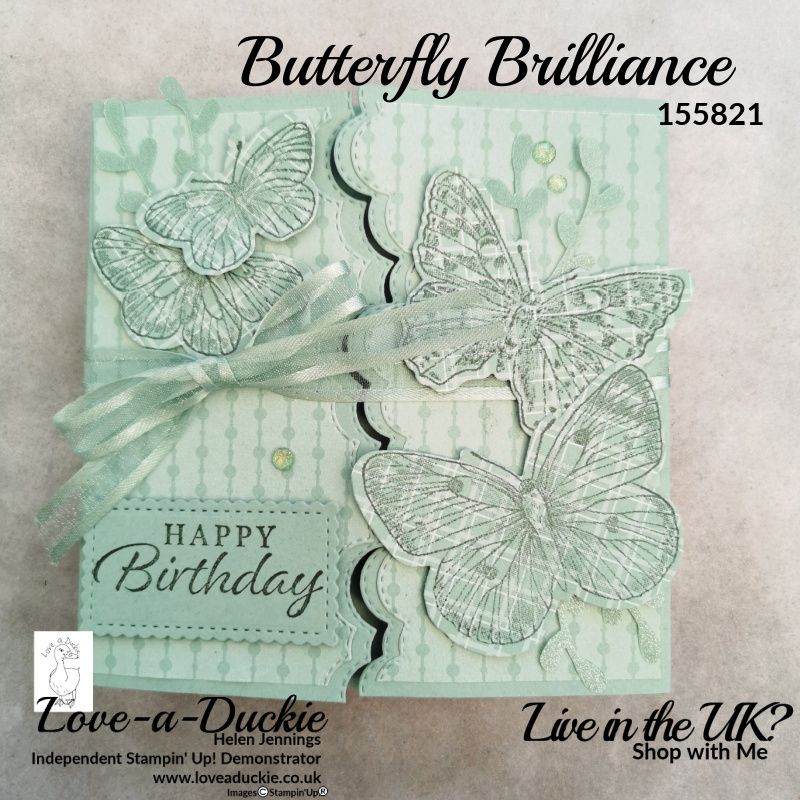
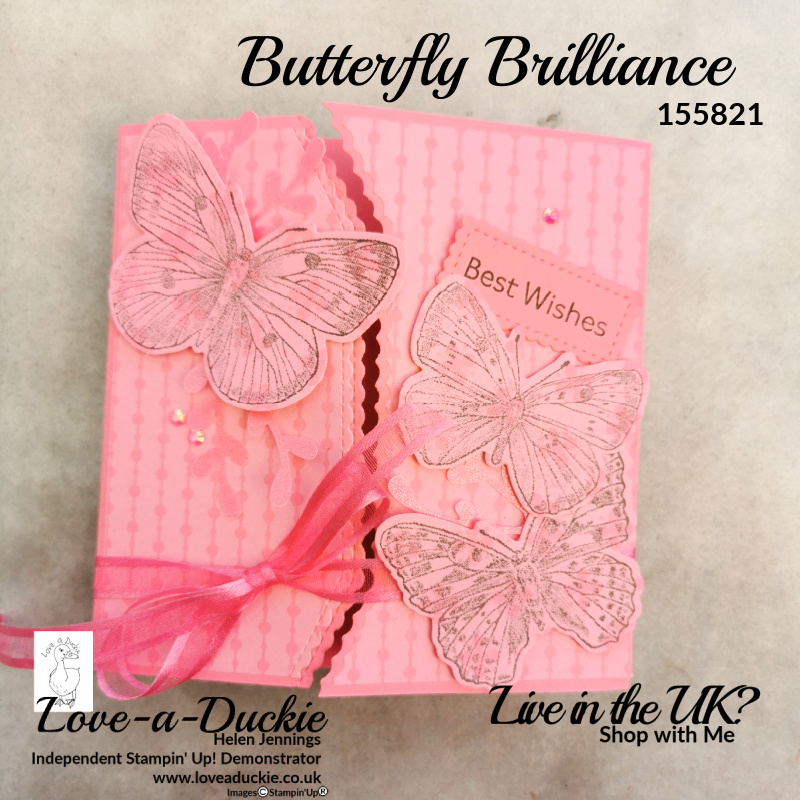
I created 2 cards, both similar and both using stamped and die cut butterflies from the Butterfly Brilliance Bundle, but they used different Border dies for the gate fold.
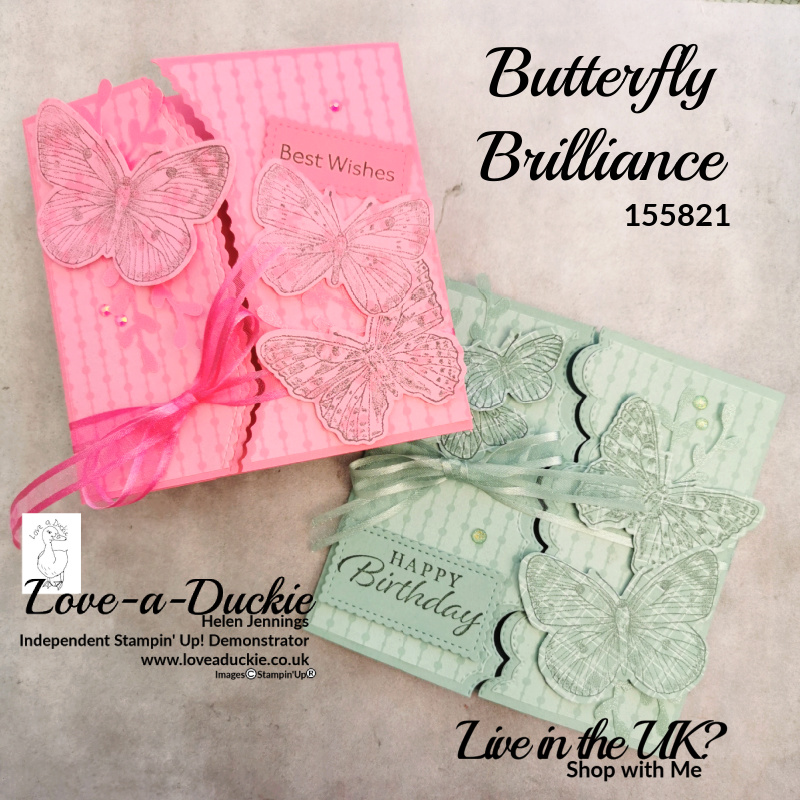
- Stamps: Butterfly Brilliance; Happy Thoughts; Art Gallery
- Tools: Brilliant Wings Dies; Stitched So Sweetly Dies; Basic Border Dies; Sprig Punch
- Paper: Polished Pink; Soft Succulent; 2021-2023 In Color Designer Series Paper. 2021-2023 Shimmer Vellum
- Ink/Pens: Evening Evergreen
- Embellishments: 2021-2023 In Color Jewels; Genial Gems; Polished Pink Open Weave Ribbon; Soft Succulent Open Weave Ribbon.
| A4 Metric | Imperial letter size | |
| Gate Fold Piece (Polished Pink or Soft Succulent) | 12.5cm x 20.5cm Scored at 4cm and 16.5cm on long side | 5″ x 8″ Scored at 1 1/2″ and 6 1/2″on long side |
| Inside Back Panel (Polished Pink or Soft Succulent) | 12.5cm x 12.3cm | 5″ x 4 15/16″ |
| Back Panel (Polished Pink or Soft Succulent) | 12.3cm x 12.3cm | 4 15/16″ x 4 15/16″ |
| DSP | 12cm x 11.5cm plus sheet for stamping/die cutting | 4 3/4″ x 4 1/2″ plus sheet for stamping/die cutting |
Instructions.
Create the Shaped Front
- Temporarily attach the DSP to the back of the gate fold piece of cardstock using Washi Tape or repositionable tape, so the long sides are adjacent to the score lines and it is centred.
- Lie the chosen border die down the centre of this piece and again hold in place with tape. Run through the Stampin’ Cut & Emboss a couple of times to ensure you have cut through the paper and the card.
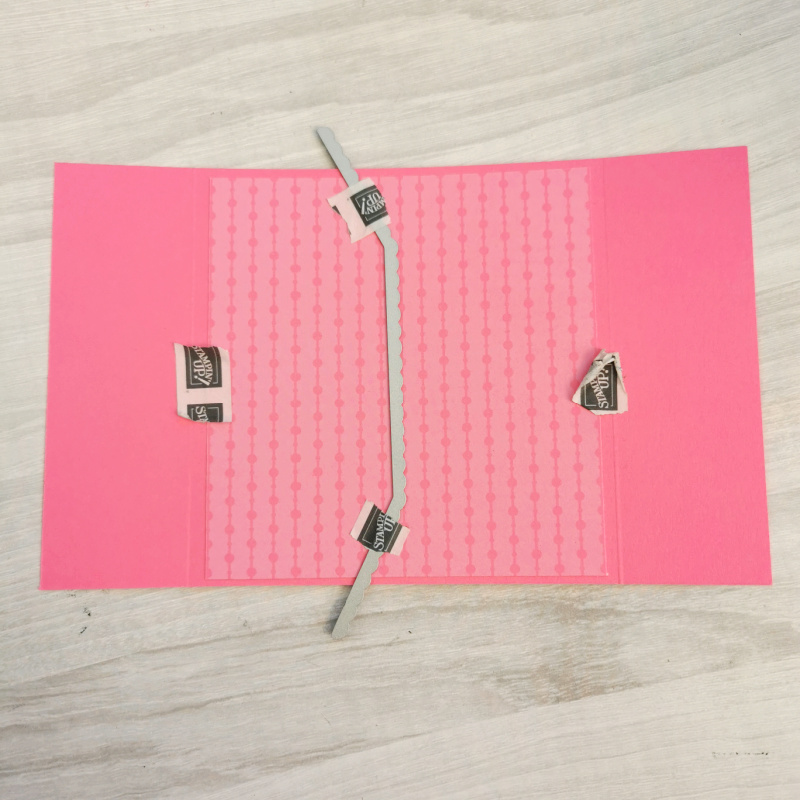
- Remove all the tape. Fold the two pieces along the score lines so you have 2 flaps. Stick the DSP to the front flaps, so the shaped edge matches up, but leaving a bit of border on both sides.
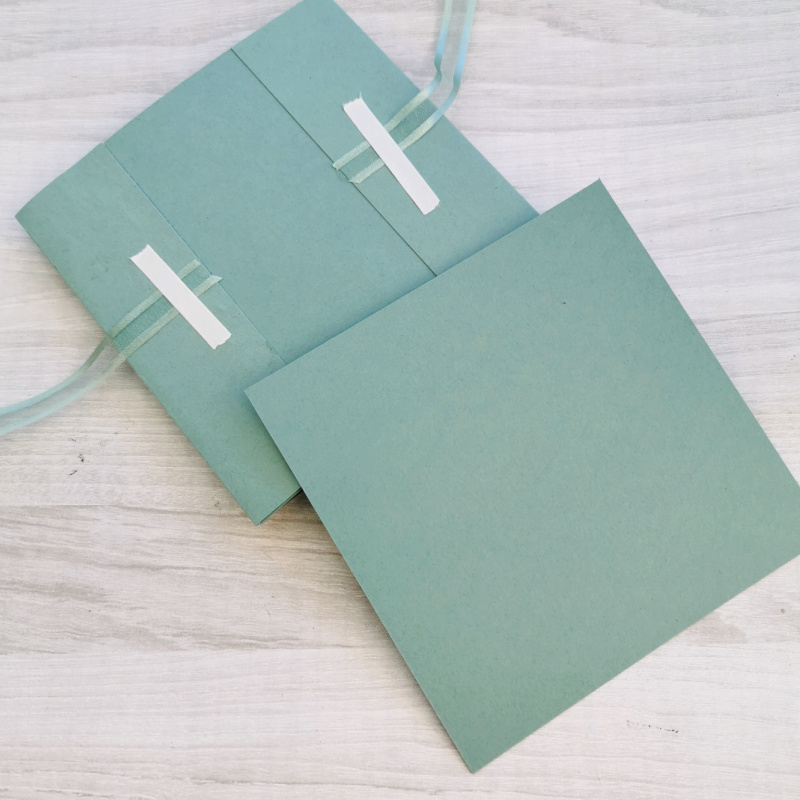
- Taking the inside back panel piece, stick the flaps to each edge. You’ll want the slightly longer edges to be resting against the folds. You may want to lay them in place and check the centre piece matches up before adding adhesive. If they don’t meet, trim another sliver off the shorter side.
- Cut two 11″/28cm pieces of the ribbon and stick the ends to the back of the card with tear & tape.
- Stick the back panel over the top.
Decorate the Card
- Stamp the Butterflies onto matching DSP with Evening Evergreen ink and die cut.
- Stamp a greeting in Evening Evergreen ink on matching card and die cut with the “Stitched So Sweetly” scalloped rectangles.
- Punch 3 sprigs from matching Shimmer vellum.
- Arrange some of the butterflies, the sprigs and the greeting on the card front using dimensionals and glue dots. Use one of the butterflies to hold down the ribbon on the right hand flap.
- Tie the two pieces of ribbon into a bow on the card front and add some embellishments. I used Genial Gems on the Soft Succulent card and In Color jewels on the Polished Pink one.
Let’s Hop
I hope you have enjoyed my project. Do leave a comment if you can, because it certainly makes my day. Then it is time to hop around all the other projects
How to Get The Tutorial Bundle
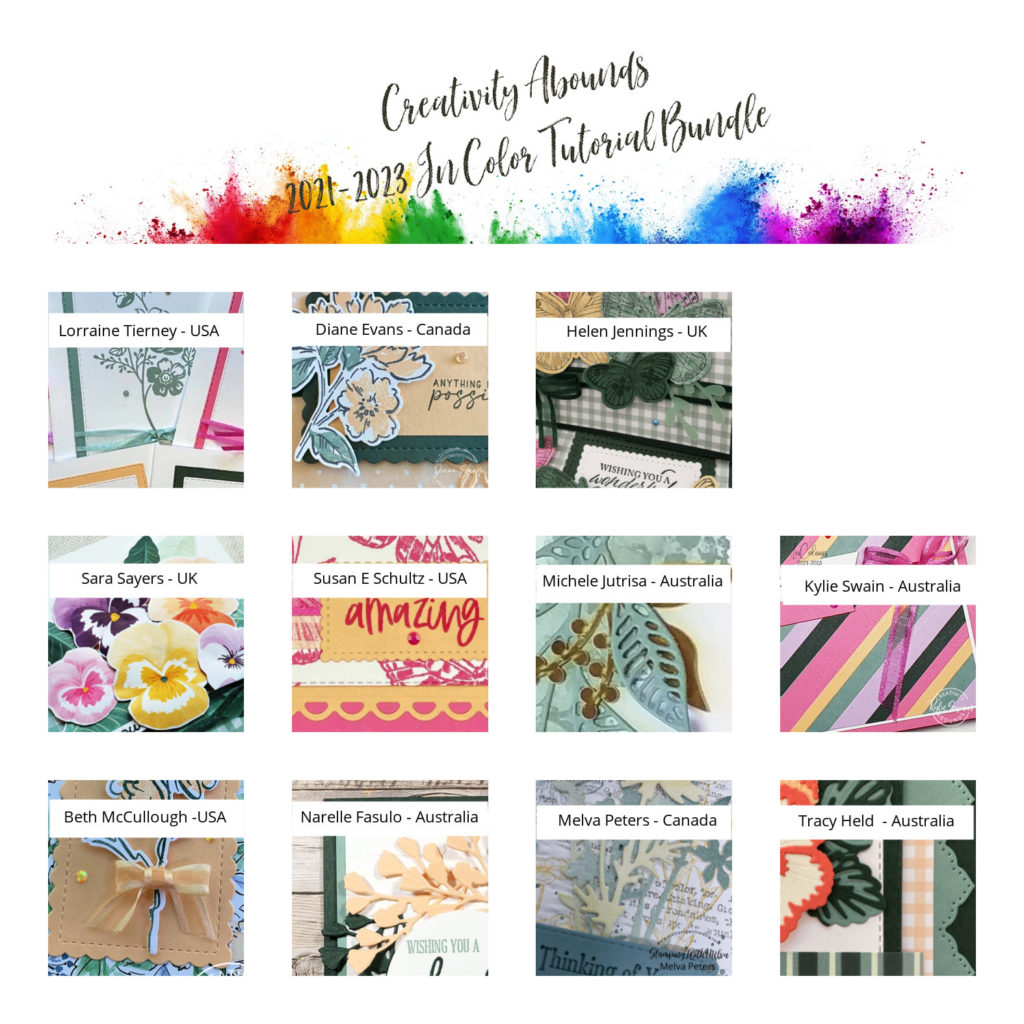
I hope you have been inspired during this hop. This project is exclusive to the blog hop, but there is lots more inspiration in the Tutorial Bundle. If you earn or buy the bundle, you will receive a PDF that will contain all the information you need to create the projects shown in the thumbnails yourself, including the products used, the measurements and detailed instructions. You can get your hands on these tutorials in a couple of ways.
- Receive it free with any purchase from me.
- Buy it from the Downloads section of my shop
- Receive it as a Member of my team
How can I Help?
I hope you will have a go at a shaped gate fold card. these new border dies are so useful for adding an extra special detail to your projects. Check out the shaped edges on the Party Puffin card I posted earlier.
If you live in the UK, I would love you to choose me as your demonstrator.
- You can shop here or click on the images listed below.
- sign up for my newsletter to receive news and inspiration
- Find out more about joining my team to get a 20% discount on your craft supplies
- email me if I can be of any assistance.
- Make sure you use the current host code so I can thank you for your order.
- Anyone purchasing from me will receive a Tutorial Bundle as a Thank You.







Helen, these are amazing Thanks for sharing I cam going to give this a try!
Wow! I love this…definitely going to CASE!
Great idea Helen – must have a go at this x
Just brilliant Helen! Great idea with those dies.
Wow…Great use of those dies
Original and awesome gate fold cards, Helen!
Great idea! I will try this.
Hi Helen, WOW these are amazing cards! I love the die cutting along the edges of the gate card.