This article about Alcohol Ink Technique using Stampin’ Blends is one from the Co-Op i am a part of and has been written by Sarah Bullen. I have my own bottles of 99% alcohol waiting to have a play with this technique, so expect to see more samples from me very soon.
Alcohol Ink Technique using Stampin’ Blends
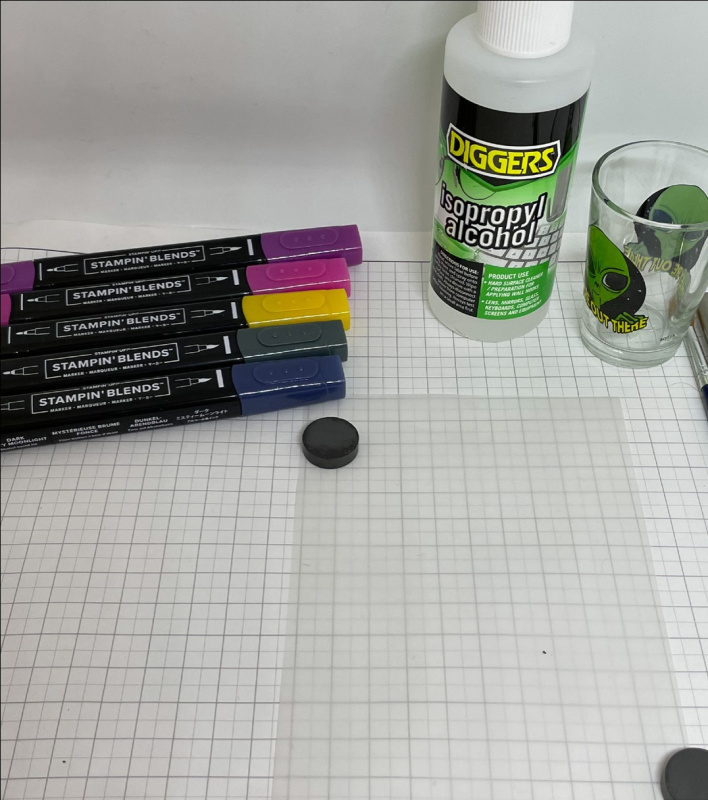
This technique allows you to recreate the alcohol ink technique without the need for alcohol ink refills – just use our Stampin’ Blends! There are a number of variations to this technique, including using a heat tool – if using a heat tool, you will need to add more alcohol than with the spritzer technique.
Supplies:
- Vellum
- Dark Stampin’ Blends (dark and/or bright colours work best)
- 99-100% alcohol
- colour spritzer or straw
- Small paint brush
- Small container (e.g. shot glass) for the alcohol
N.B. If using a straw for this technique, please be very careful not to inhale the alcohol fumes! Spritzers are inexpensive and allow far greater control than a straw. They’re also a lot safer!
NOTES:
- Make sure you’re working in a well-ventilated area
- Make sure the alcohol is 99-100% alcohol, otherwise it won’t work
- The vellum will curl so use magnets (if they will work on the surface you’re using) or heavy objects to hold down the vellum
- A spritzer is ideal as it’s easier to move the ink in the desired direction, especially if securing vellum in place.
Instructions
1. Using the Stampin’ Blends, scribble all over the vellum, leaving some gaps.
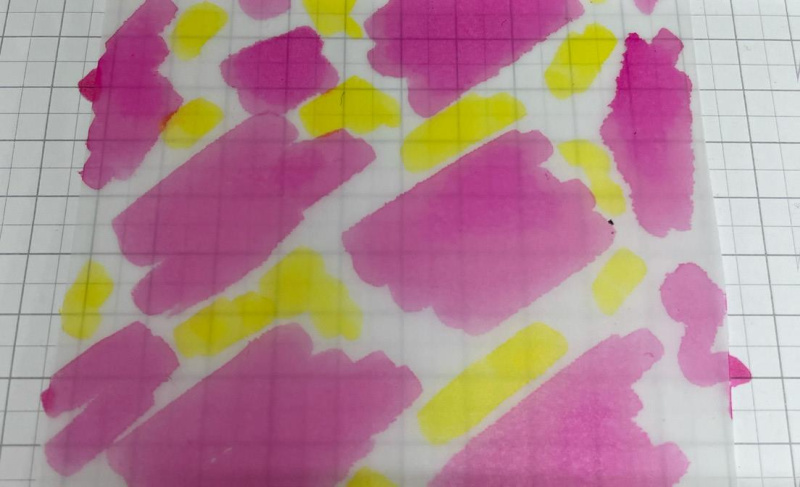
2. Dip the paint brush in alcohol and dab around the edges of a coloured section of vellum
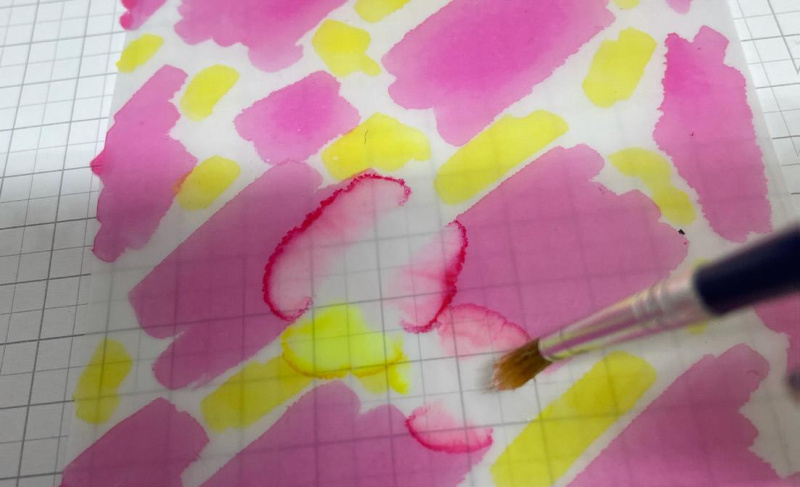
3. Using a spritzer or straw, ‘push’ the ink around as desired. As the alcohol dries quickly, you need to work reasonably fast, but you can always add more alcohol as required.
4. Continue adding alcohol and moving the ink around the vellum.
5. If necessary, you can add more colour with the blends (just make sure the section you’re adding it to is dry).
6. Once finished, let the vellum dry thoroughly.
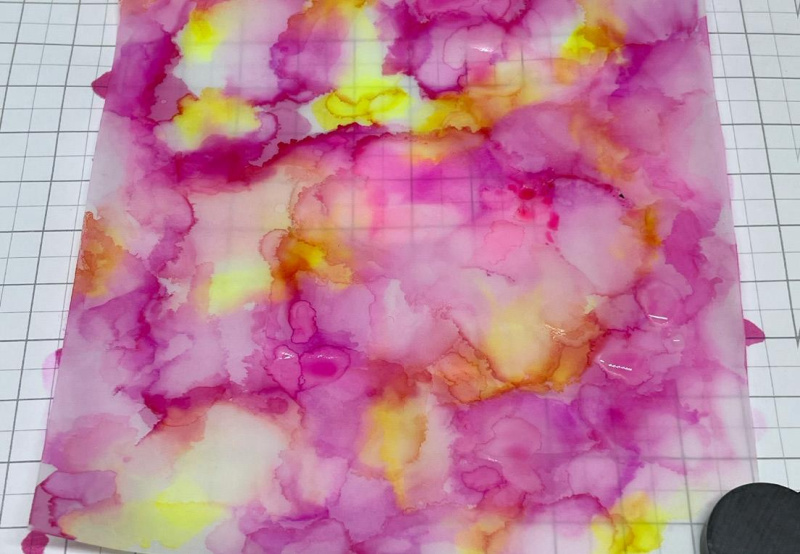
7. Once dry, you may need to flatten the piece before using (I use punches to weigh it down)
8. Adhere the vellum to Basic White Cardstock.
9. Cut/punch/die cut as desired.
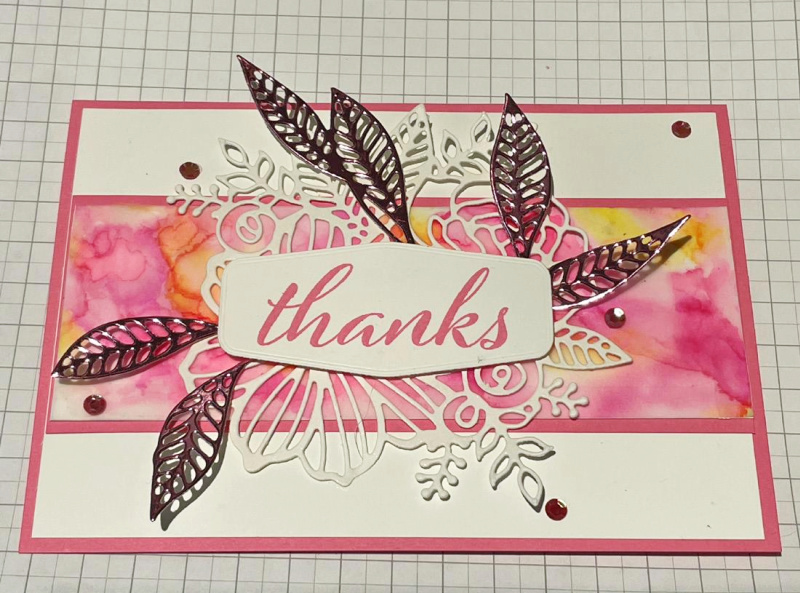
N.B. This technique can be done with single or multiple colours. Be careful not to use too many colours as you are likely to end up with a murky brown colour!
The colours (blends) used here were Dark Polished Pink and Dark Mango Melody.
How Can I Help?
I hope you have been inspired by Sarah’s article and her pretty card using the Artistic Dies.
I would love to see any projects you create using this fun technique.
meanwhile stay safe and stay well
Helen xx
If you live in the UK, I would love you to choose me as your demonstrator.
- You can shop here or click on the images listed below.
- sign up for my newsletter to receive news and inspiration
- Find out more about joining my team to get a 20% discount on your craft supplies
- email me if I can be of any assistance.
- Make sure you use the current host code so I can thank you for your order.
- Anyone purchasing from me will receive a Tutorial Bundle as a Thank You.
