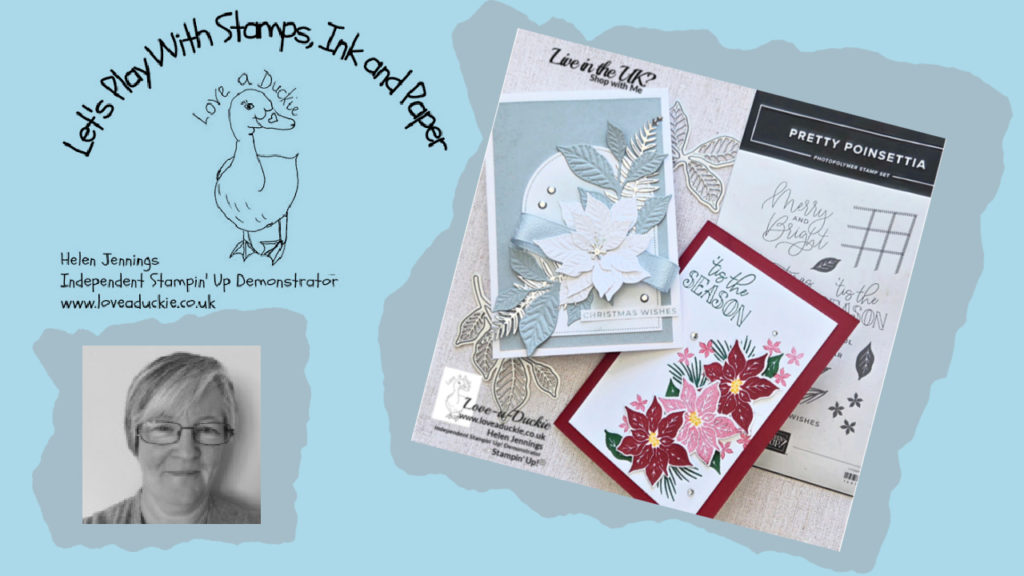
Pretty Poinsettia – Two Christmas Cards, Two Completely Different Looks! I enjoyed all the creative possibilities of creating cards with the Pretty Poinsettia bundle from Stampin’ Up on a recent Live.
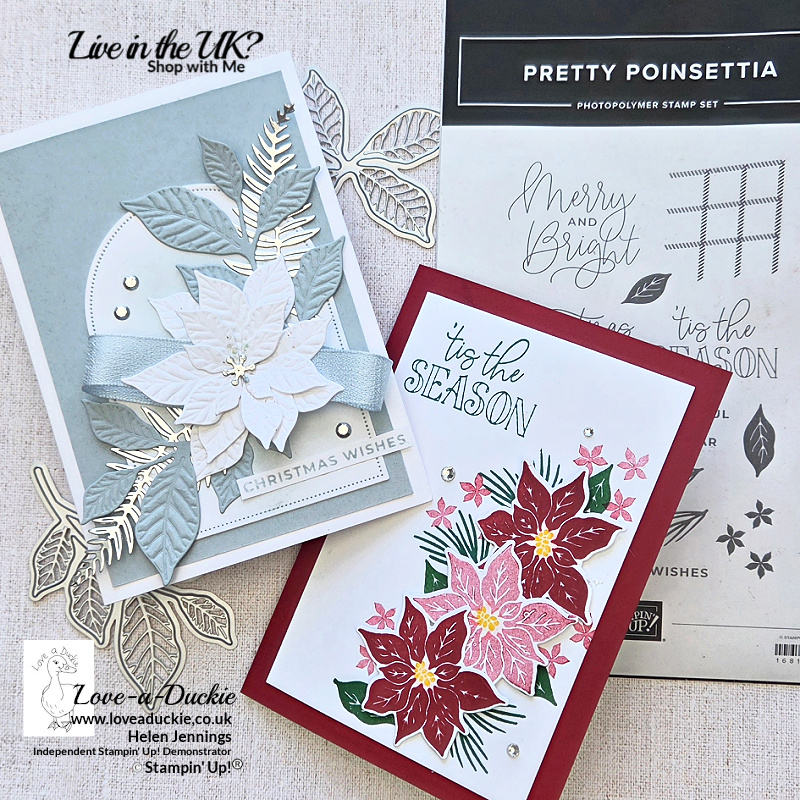
Sometimes it’s fun to take one stamp and die bundle and see just how different you can make your projects!
On this week’s Live from the Lilypad, I was playing with the gorgeous Pretty Poinsettia Bundle from Stampin’ Up!, creating two very different Christmas cards.
One features traditional Christmas colours, with beautiful Cherry Cobbler poinsettias and rich green foliage. The other takes a completely different direction, with an elegant white poinsettia, soft Cloud Cover and touches of shimmering silver.
I can’t decide which I prefer!
Pretty Poinsettia – Two Christmas Cards, Two Completely Different Looks!
Traditional Christmas Colours
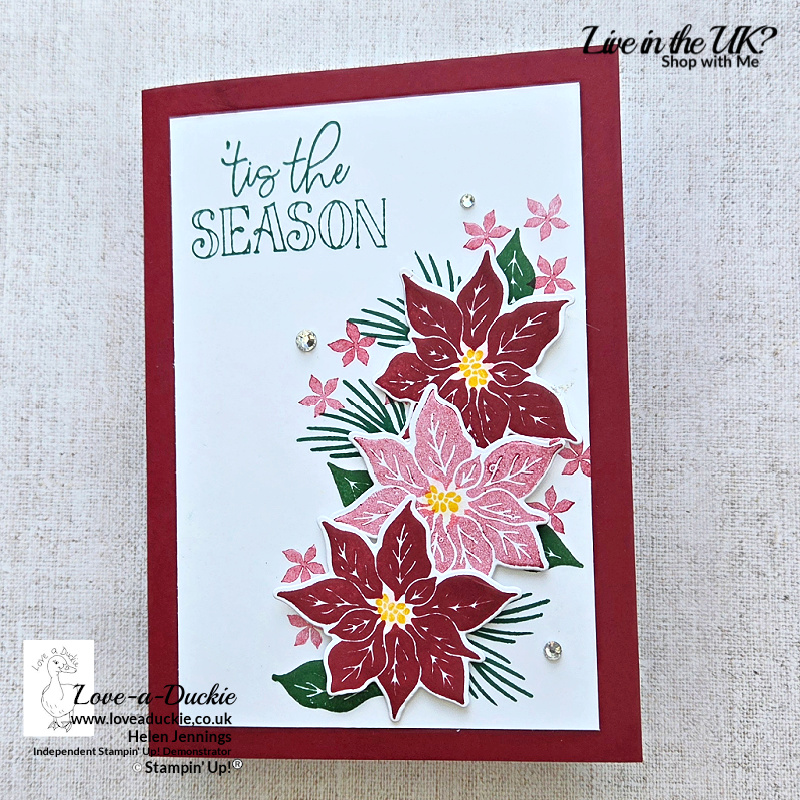
For my first project, I chose the classic Christmas combination of Cherry Cobbler, Garden Green and Shaded Spruce.
The Pretty Poinsettia stamp set creates beautiful floral images, and I wanted to show how simply changing the intensity of your ink can add variation to your finished design.
I stamped two poinsettias using Cherry Cobbler ink and then stamped a third using second-generation stamping. This simply means stamping onto scrap paper first, before stamping again without reinking. The result is a softer, paler version of the original colour.
After cutting out all three flowers using the coordinating dies, I arranged them on my Basic White cardstock mat to work out where I wanted them to sit.
This gave me a guide for stamping my background foliage.
I used Garden Green for the leaves and Shaded Spruce for the lovely sprig-like foliage. I also added some delicate second-generation flowers between the poinsettias to fill in the gaps and bring everything together.
The poinsettias have cheerful Crushed Curry centres, which provide a lovely contrast against the rich reds.
Once I was happy with my stamped background, I attached the die-cut poinsettias using Stampin’ Dimensionals, adding some wonderful depth to the design.
The sentiment, “‘Tis the Season”, was stamped in Shaded Spruce.
I finished the card with a few Basic Rhinestone Jewels for a little Christmas sparkle.
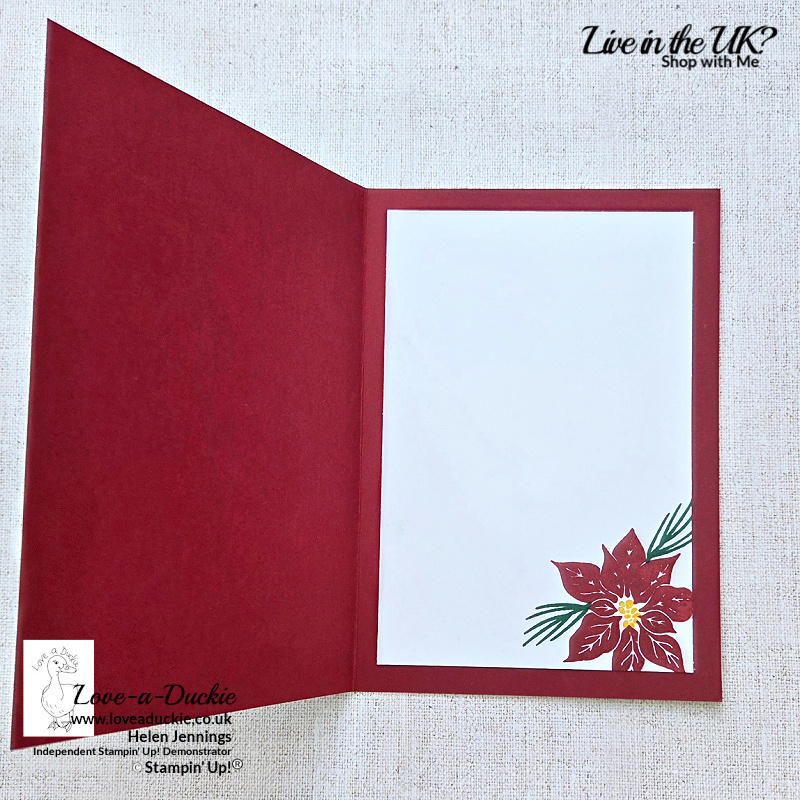
And we can’t forget the inside!
I stamped another poinsettia, together with some of the coordinating foliage, on the inside of the card. It’s such a simple finishing touch, but it makes the whole project feel extra special.
The finished design was mounted onto a Cherry Cobbler card base.
Colours used: Cherry Cobbler, Garden Green, Shaded Spruce and Crushed Curry.
Frosty Elegance with Cloud Cover and Silver
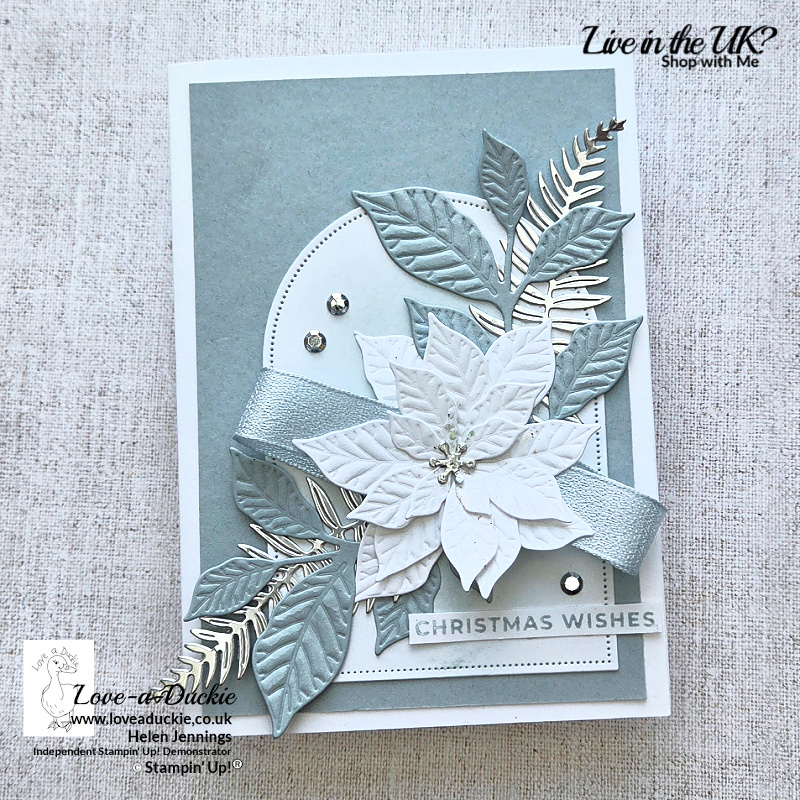
My second project couldn’t be more different!
This time, I wanted to create something elegant and wintry, using predominantly white with soft Cloud Cover and touches of silver.
The beauty of this card really comes from the fabulous detailed embossing you can achieve using the Pretty Poinsettia Dies and the Impressions Plate.
I started with a Thick Basic White card base and added a Cloud Cover cardstock mat.
Next, I used the number four die from the Everyday Arches Dies to create a Basic White arch. Using a Blending Brush, I softly added Cloud Cover ink to the arch to introduce a little colour and help the white poinsettia stand out.
For my focal flower, I die-cut four poinsettia pieces from Basic White cardstock.
Here’s where the magic happens!
After cutting the pieces, I used the Impressions Plate to run them through my Stampin’ Cut & Emboss Machine again, adding the beautiful detailed embossing.
It’s amazing how much difference this extra step makes. The petals suddenly have texture and definition.
I repeated the process with two sets of leaves cut from Cloud Cover cardstock, giving those the same deep embossed detail.
To introduce some festive sparkle, I cut additional foliage using the Fern and Flora Dies and Silver Foil. I also die-cut the poinsettia centre from Silver Foil.
After assembling the poinsettia, I attached it to the card using Stampin’ Dimensionals and arranged the embossed leaves and silver foliage around it.
I trimmed some of the foliage to fit the design.
A couple of loops of ribbon added softness and another layer of texture.
A little tip: I decided to add my ribbon after attaching the poinsettia. If you’re recreating this card, you’ll probably find it easier to position your ribbon before attaching your flower!
For the sentiment, I stamped “Bright Christmas Wishes” in Cloud Cover ink but trimmed away the word “Bright” so that I could use just “Christmas Wishes”.
Finally, I added a few Adhesive-Backed Metallic Gems to complete the design.
I absolutely love the combination of embossed white cardstock, muted blue-grey tones and shimmering silver.
It’s a completely different way of using the same bundle!
Colours used: Basic White, Cloud Cover and Silver Foil.
Watch the Video
You can see both these cards being created on this recording of my Live.
How Can I Help
What I particularly love about these projects is that they demonstrate two different ways of using the Pretty Poinsettia Bundle.
The traditional Christmas card makes the most of the stamps, with layered colours and a combination of first- and second-generation stamping.
The frosty white card focuses on the dies and the incredible embossed detail you can achieve with the Impressions Plate.
Whether you love traditional Christmas colours or prefer something a little more contemporary, this bundle has plenty of possibilities.
Which would you choose? Traditional Christmas or frosty elegance?
I’d love to hear which is your favourite!
If you’d like to have a play with the Pretty Poinsettia Bundle yourself, you can find it in my online Stampin’ Up! shop.
Don’t hesitate to get in touch if I can help with your purchases, or if you have a crafty question.
Meanwhile stay safe and stay well
Helen xx
If you live in the UK, I would love you to choose me as your demonstrator.
- You can shop here or click on the images listed below.
- sign up for my newsletter to receive news and inspiration
- Find out more about joining my team to get a 20% discount on your craft supplies
- email me if I can be of any assistance.