
Thanks for visiting my blog today.
I am part of a group of Stampin’ Up! Demonstrators from all around the world who are training together in Kylie Bertucci’s Demonstrator Support Program 2019-2020 to grow and improve our Stampin’ Up! Businesses.
Each month we join in a fun Blog Hop together, sharing our creations with each other and with many other people around the world.
After viewing my blog, please click on the blog links at the bottom of the page to hop on to see the awesome creations of the other Demonstrators in our training group.
My Card
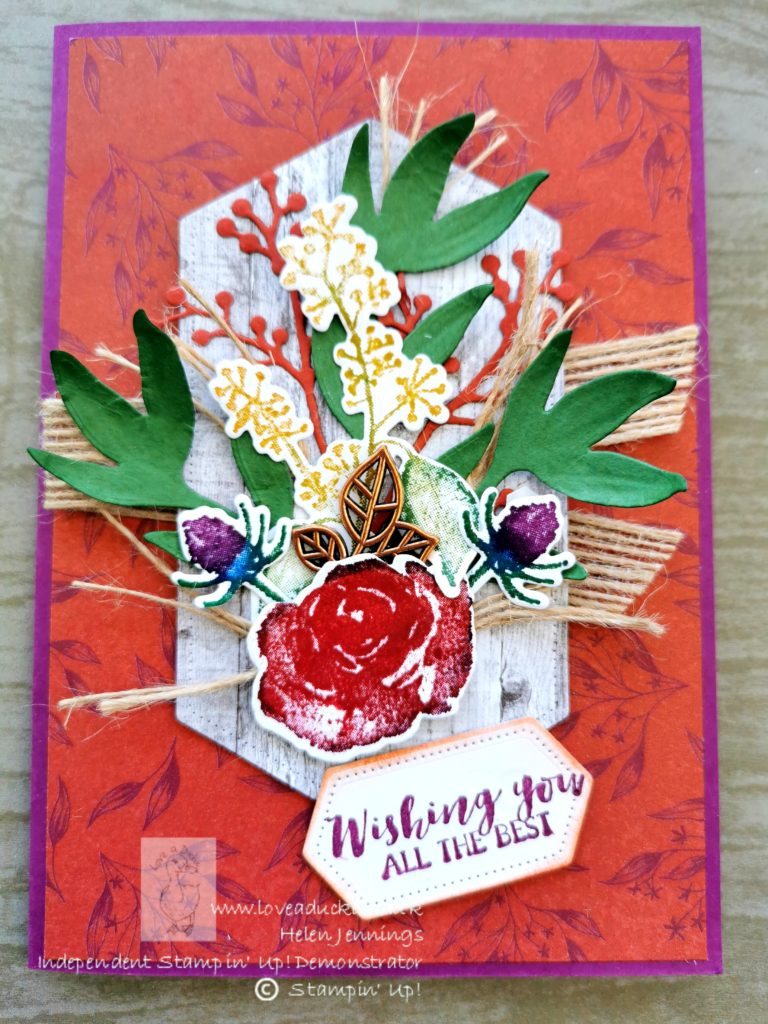
I decided for this month’s I would bring out an old favourite to create a bouquet of autumnal flowers with a touch of shimmer.
Techniques
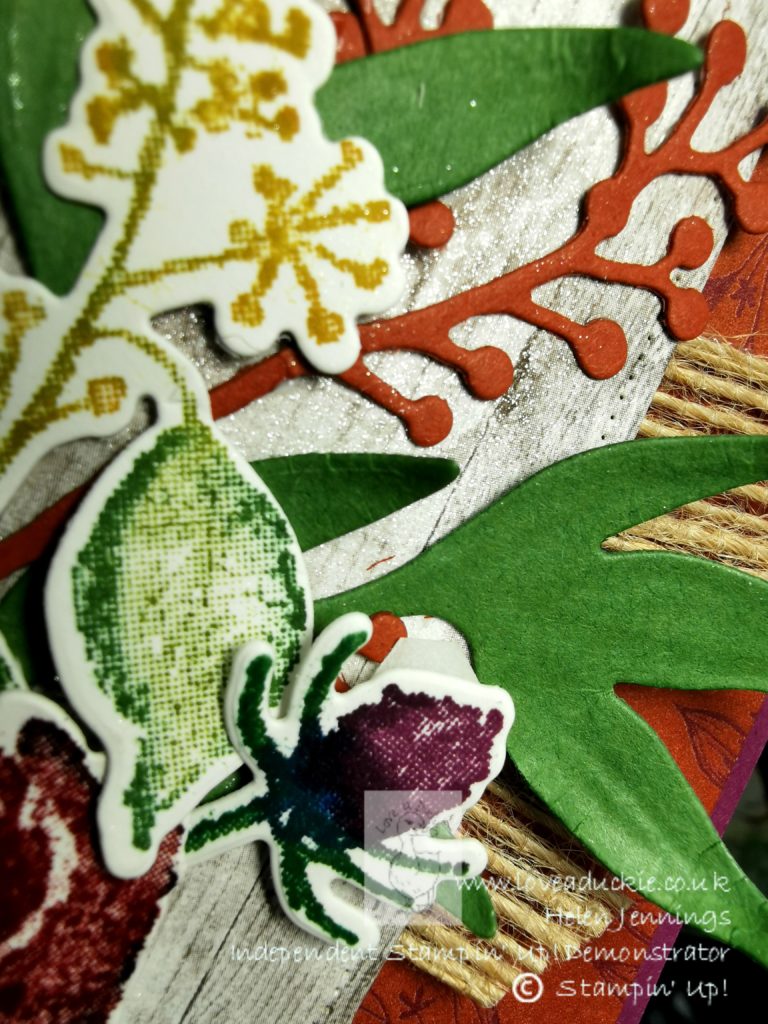
To create the stamped flowers and foliage I used a technique that I love doing with this type of stamp.
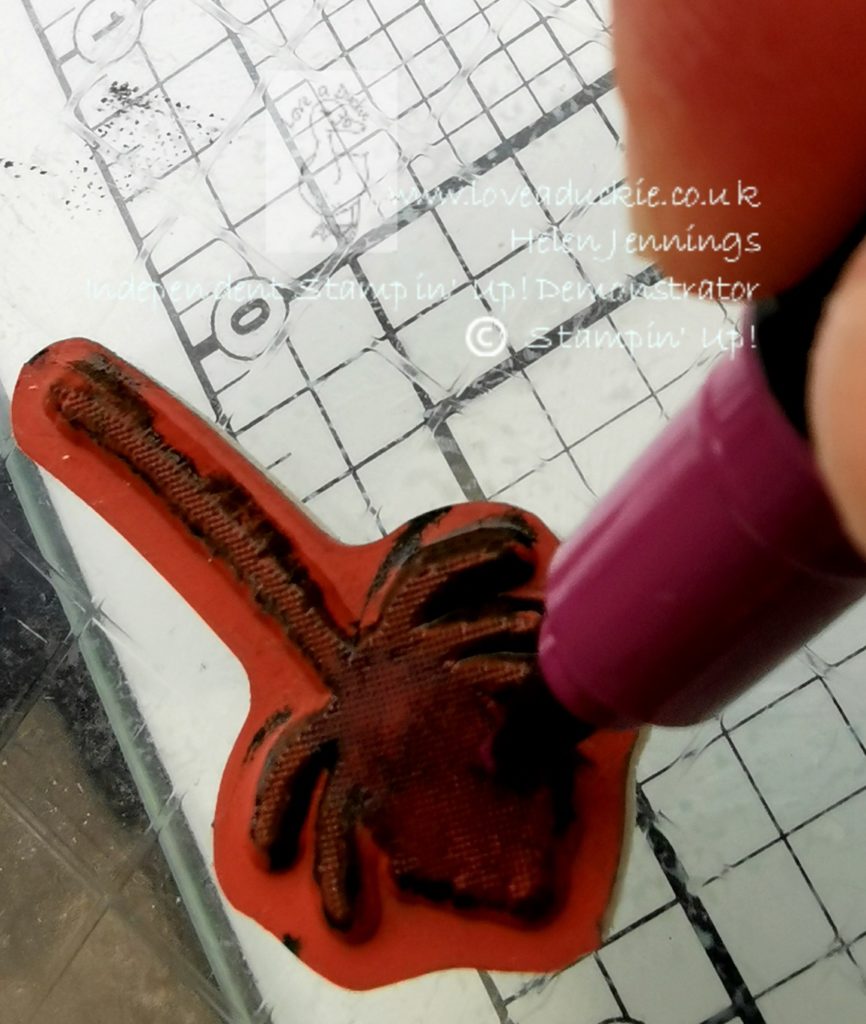
Using my Stamparatus and the Stampin’ Write markers I coloured direct on to the stamp to add the colour. The fabulous thing about doing this technique on the Stamparatus, is the fact that you can lay down one colour, stamp it and then add in subsequent colours and you can create a beautiful blended effect.

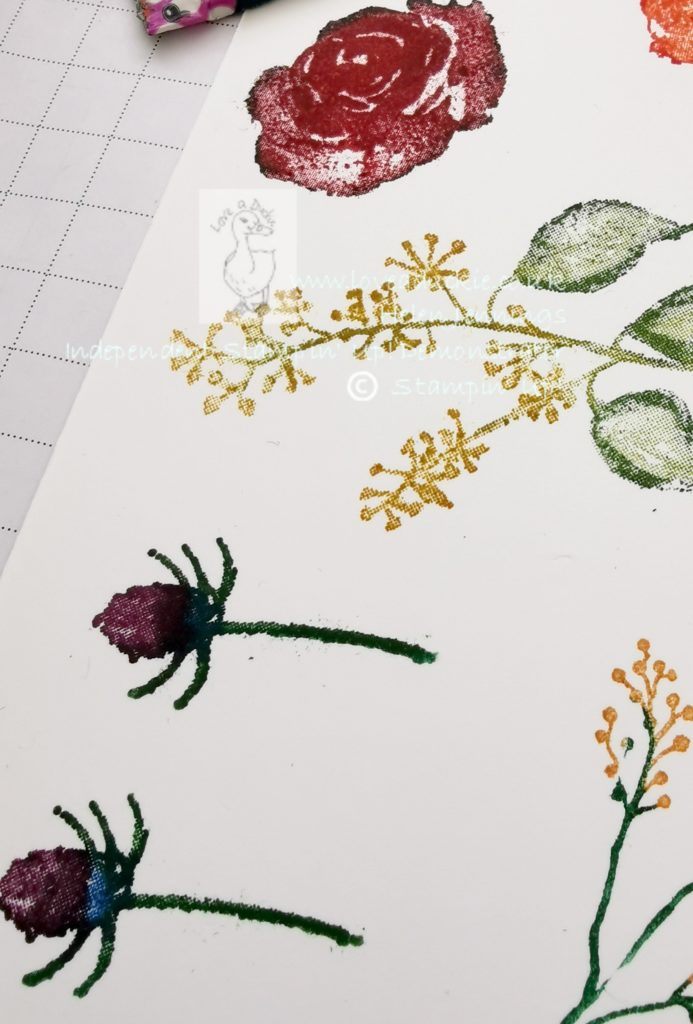
I die cut some foliage and leaves from cardstock. I used the embossing tool end of my Pick Up Tool to shape the leaves and give them some dimension.

Shimmer
One of the most popular Designer Series Papers in last year’s Autumn/Winter catalogue was the shimmery paper that co-ordinated with the first frost stamps and dies. It had such a simple elegance about it. In order to re-create that effect, I die cut a stitched label from the wood effect paper from the “Come to Gather” pack and then spritzed it with some Frost White shimmer paint diluted in Rubbing Alcohol.
I used some more of the paper from the Come to Gather pack as a mat on the Rich Razzleberry card base. I then added a swirl of burlap ribbon to the back of the shimmery stitched label before attaching it with dimensionals. Now for some flower arranging. I stuck some of the elements flat with tombow and others with mini dimensionals to raise them up.
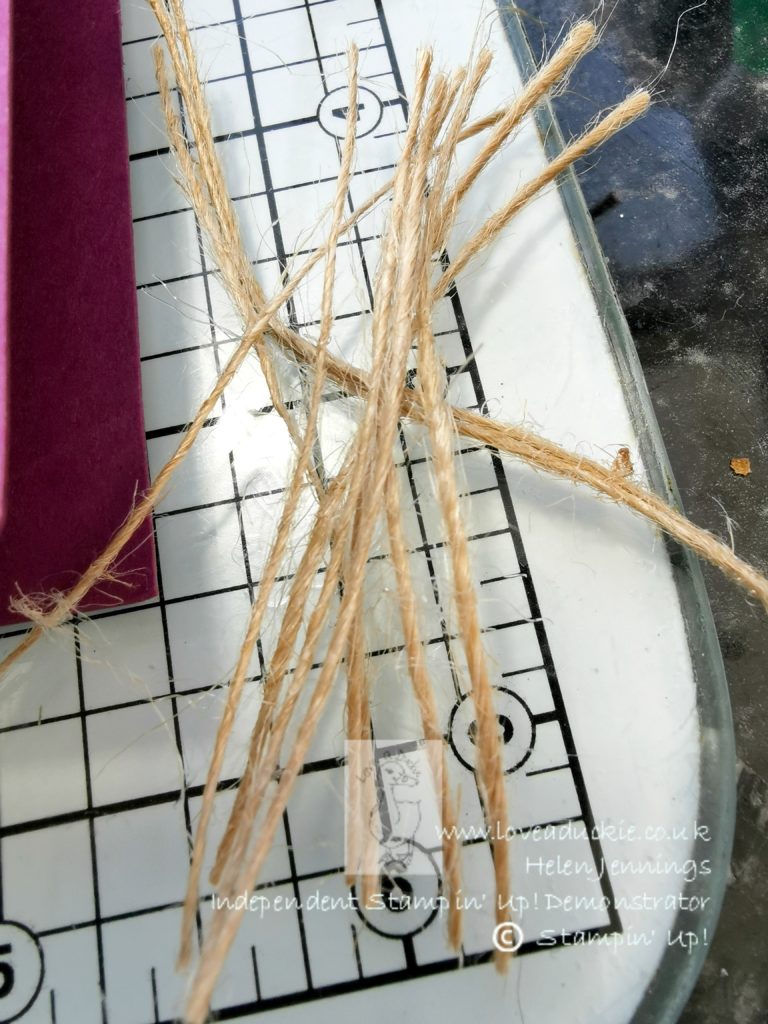
I took a short length of the burlap ribbon and snipped it and pulled out the individual threads, I then took pairs of the threads and doubled them over and tucked them around the arrangement, securing them with a glue dot.
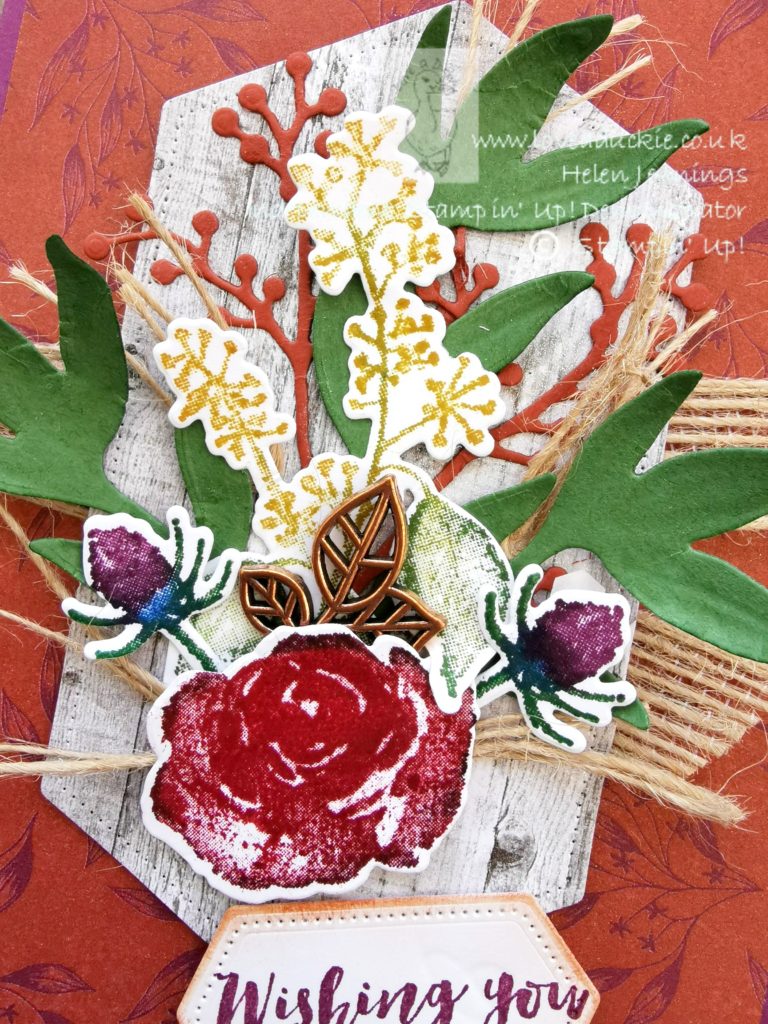
I added a sentiment stamped onto a small stitched label and inked around the edge. The finishing touch was one of the small, copper, metallic leaf embellishments
Now you have checked out my card, be sure to go and visit the other bloggers in the hop. Leave them a comment to let them know you have visited. It makes us happy.
And if you would like to check out some of the supplies I have used, you will find them listed at the end of this post. If you live in the UK, I would be happy to help you if you NEED these in your stash.
Go Hopping
Supplies
Product List
|
|


 Burlap Ribbon")

.Happy Crafting
Helen xx


Wow, you put some much work into this beautiful card Helen, well done 🙂
Thank ayou ❤️
Stunning! I liked all the texture!
Thank you ❤️
Wow, such detail! It is gorgeous, Helen!
Thank you ❤️
So much work and detail Helen! Great card!
Thank you Deb
wonderful! Thank you for the inspiration. The card is so intricate and colorful, I wish I could come up with creative ideas. Thank you for sharing yours.
Thank you so much