For this month’s hop with the Demonstrator Support Program gang, I have created a thank you notecard using the cute little rabbits from the Oval Occasions stamp bundle.
A Thank You Notecard
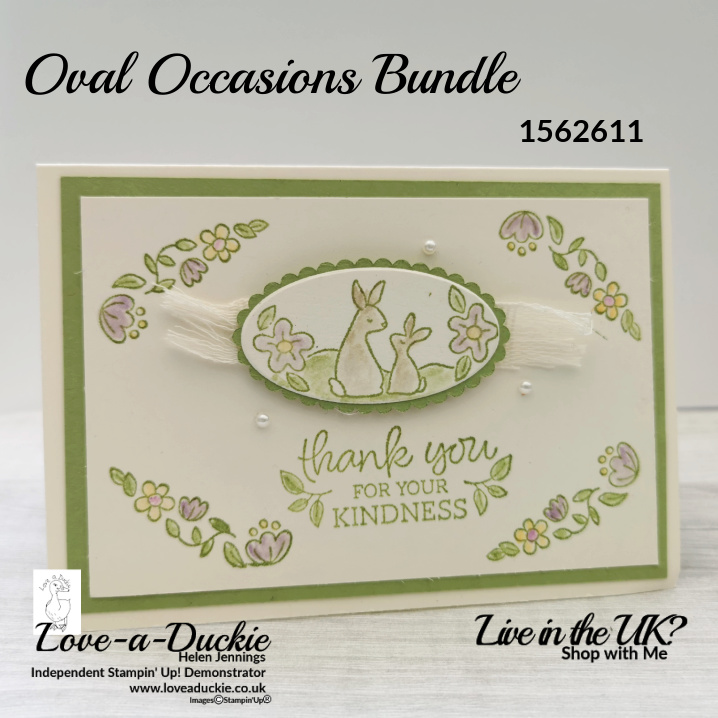
This bundle consists of a sweet little stamp set and coordinating ovals punch. The stamp set has a variety of useful sentiments that work with the punched plain and scalloped ovals. They are useful for so many projects. There are also the cute rabbits and some floral images on the stamp set.
- Stamps: Oval Occasions
- Ink: Pear Pizzazz, Gray Granite; Highland Heather, Mango Melody, Melon Mambo
- Tools: Double Oval Punch; Layering Oval Dies;`Blender pen
- Paper: Very Vanilla Notecards & Envelopes, Pear Pizzazz, Very Vanilla
- Embellishments: Basic Pearls; Forever Greenery Trim combo
| A4 Metric | Imperial Letter Size | |
| Card Base | Very Vanilla Notecard | Very Vanilla Notecard |
| Pear Pizzazz | 12cm x 8.3cm | 4 3/4″ x 3 1/4″ |
| Very Vanilla | 11.5cm x 7.8cm | 4 1/2″ x 3″ |
| Very Vanilla | For die cut oval | For die cut oval |
Instructions
- Fold the notecard in half along the score line.
- Punch the scalloped oval from the centre of the Pear Pizzazz mat before attaching the mat to the notecard.
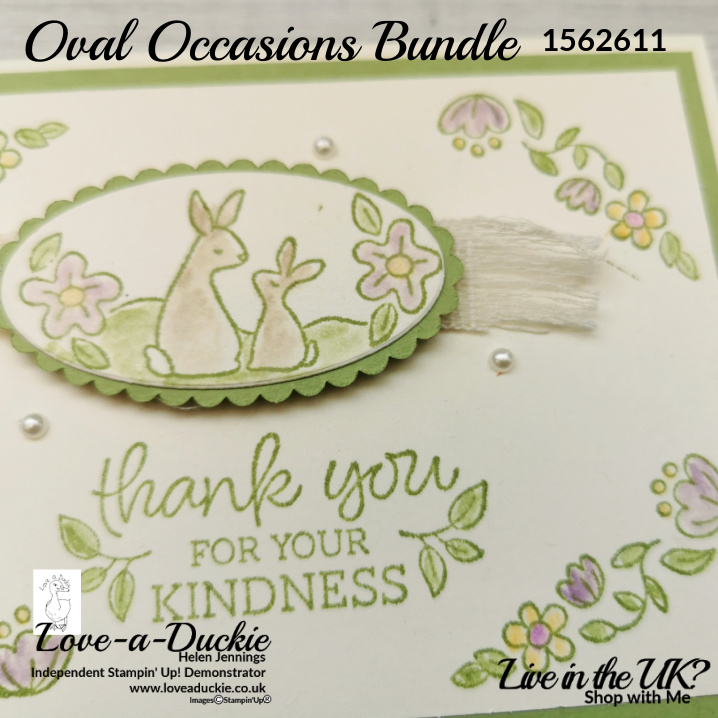
- Stamp the rabbit onto some Very Vanilla Card with Pear Pizzazz ink before die cutting with the 2nd smallest plain oval from the Layering Oval set. This is fractionally larger than the oval punch.
- Stamp the floral banner on the 4 corners of the Very Vanilla mat with Pear Pizzazz ink and the sentiment in the bottom centre.
- Use a blender pen and picking up the colour from the lids of your ink pads, colour the rabbits with Gray Granite, the grass and leaves with Pear pizzazz and the flowers with Highland Heather, Mango Melody and Melon Mambo. You will need to do this gently and not over working it, as the blender pen may break the surface of the card if it gets too wet.
- Take two small pieces of the Very Vanilla soft weave ribbon and fray the end (one end will fray much easier than the other, which is why it is better to use 2 strips.)
- Stick the stamped oval to the scalloped oval. attach to the card front, with the 2 strips of ribbon attached underneath and showing each end.
- Finish with some pearls.
Let’s Hop
I hope you have enjoyed my project. Do leave a comment if you can, because it certainly makes my day. Then it is time to hop around all the other projects

How Can I Help?
I shall be sending this card out as a customer thank you this month. If there are any products or classes you would like to purchase, do get in touch. i would love to help.
Stay safe and Stay Well
Helen
If you live in the UK, I would love you to choose me as your demonstrator.
- You can shop here or click on the images listed below.
- sign up for my newsletter to receive news and inspiration
- Find out more about joining my team to get a 20% discount on your craft supplies
- email me if I can be of any assistance.
- Make sure you use the current host code so I can thank you for your order.
- Anyone purchasing from me will receive a Tutorial Bundle as a Thank You.


very pretty, sweet card, Helen!
This card is adorable in the soft colours and adorable Rabbits! Thank you Helen for taking part in our Demonstrator Training Blog Hop this month.
Really cute card, Helen. TFS.
Sweet Card thanks for sharing xx
Love you card thanks for sharing xx
A very sweet card! I love it!
Such a sweet card!
Lovely delicate looking card Helen x
Hi Helen, I love your card. Thank you for sharing.
Lovely card. Thank you for sharing
That is such a sweet, sweet card!
Soft and beautiful colours!
Such a pretty card and I love your colour combo x
Very pretty card!!