For this month’s Blogging Friends Blog Hop I have created a Vellum card using the Artfully Composed suite of products.
The aim of this blog hop is to showcase this suite of projects, so I hope you enjoy the different ideas.
A Vellum Card
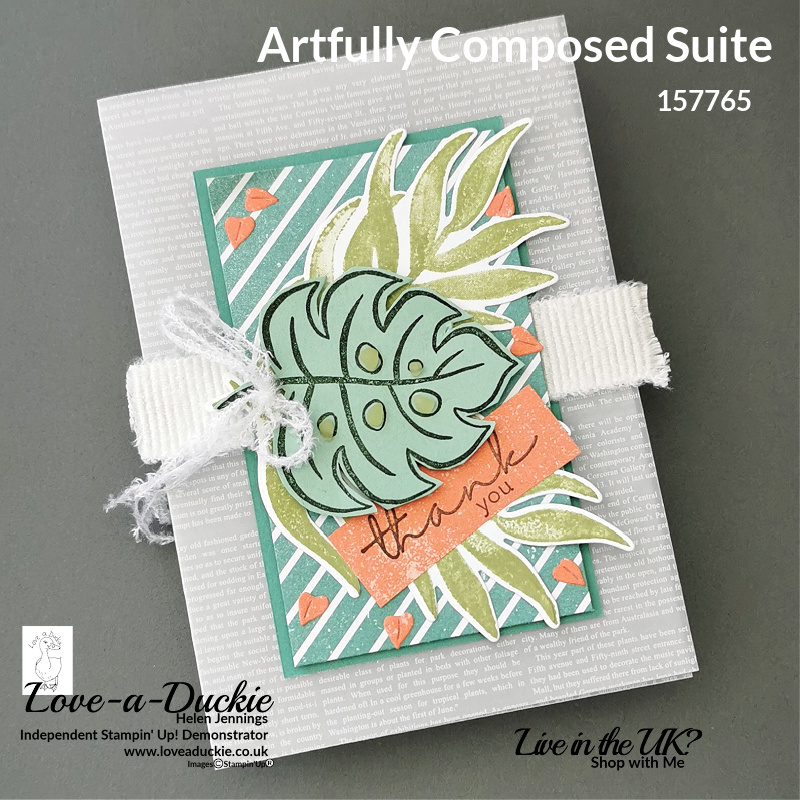
As well as beautiful Designer Series papers, this suite also includes a pack of printed vellum. I decided to use this as my card base.
Measurements
| A4 Metric | Letter Size Imperial | |
| Vellum Card base | 14.9cm x 21cm Scored at 10.5cm on the long side | 8 1/2″ x 5 1/2″ Scored at 4 1/4″ on the long side |
| Just Jade | 11.4cm x 7cm | 2 3/4″ x 4 |
| DSP | 10.9cm x 6.5cm | 2 1/2″ x 3 3/4″ |
| Basic White (x2) | 10,9cm x 6.5cm | 2 1/2″ x 3 3/4″ |
Instructions
- Fold the Vellum along the score line and burnish well to create the score line
- Stick the Just Jade cardstock mat to the centre of the card base.
- Add a 10.5cm/4 1/4″ piece of Frayed White ribbon across the centre of the card and attach to the Just Jade mat with tear & tape.
- Add the DSP layer over the top of the ribbon with dimensionals.
- Stamp the large leaves onto Basic White card and the wide leaf onto Mint Macaron cardstock. Die cut with the coordinating dies.
- Die cut the small leaves from Designer Series paper and stamp the sentiment onto the same paper.
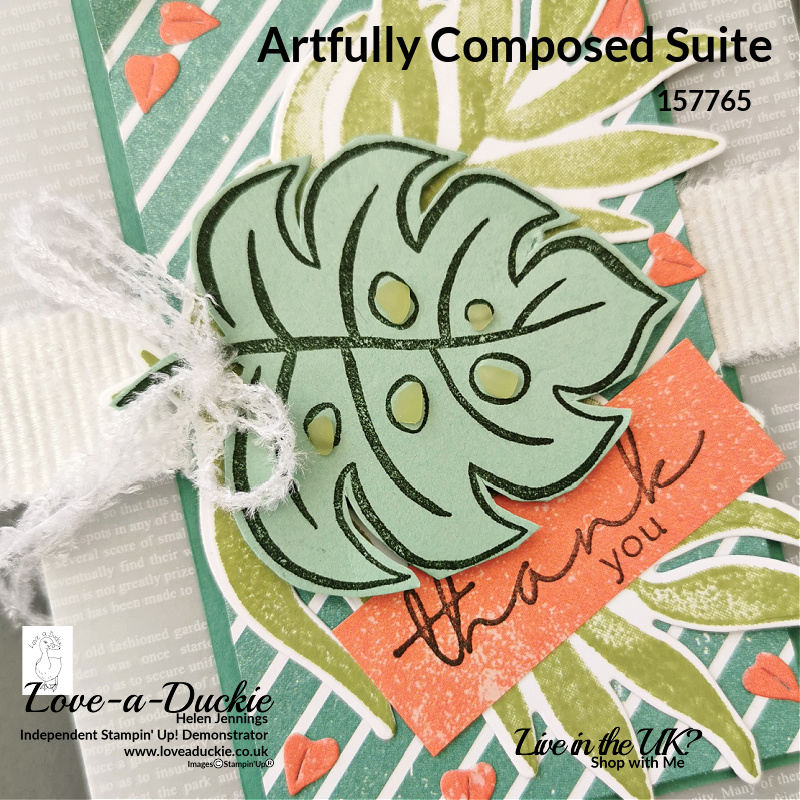
- Arrange the leaves and sentiment onto the card front, raising the front leaf up with dimensionals.
- Pull a thread from the Frayed White ribbon and use it to create a double bow. Attach with a glue dot.
- Add some Faux Sea Glass pieces to the dots on the Mint Macaron leaf.
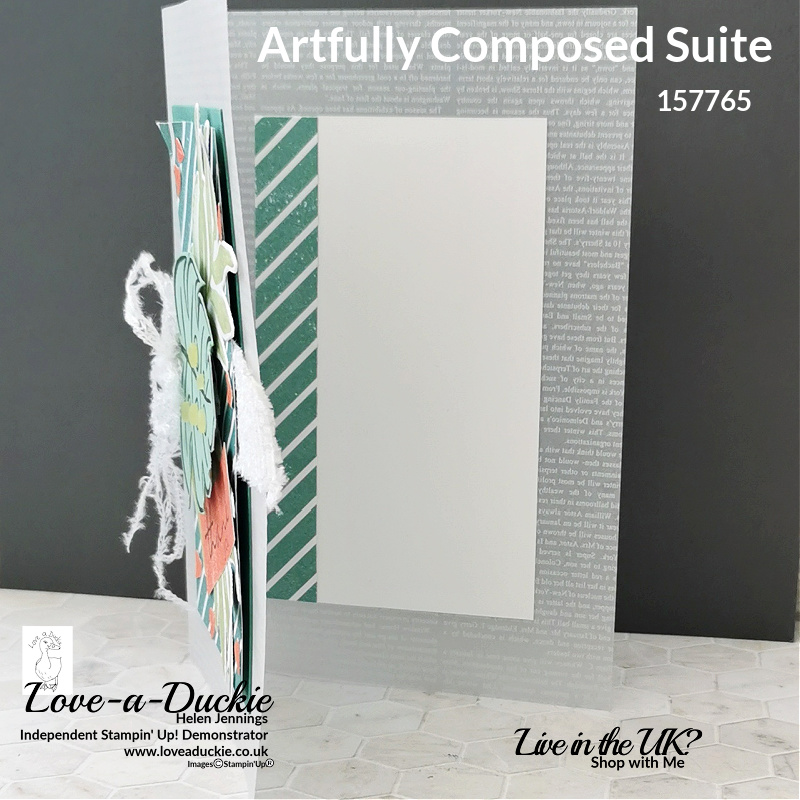
- On the inside of the card, stick one of the pieces of Basic White card to the left hand side, centred under the Just Jade mat on the front to cover the adhesive. Line the other Basic White piece up on the right hand side to use as a greetings panel. I did this by lying the Basic White mat face down on the mat on the left hand side, adding adhesive to the back and then closing the card. Finish with a strip of DSP.
Let’s Hop
I hope you have enjoyed my project. Do leave a comment if you can, because it certainly makes my day. Then it is time to hop around all the other projects
How Can I Help?
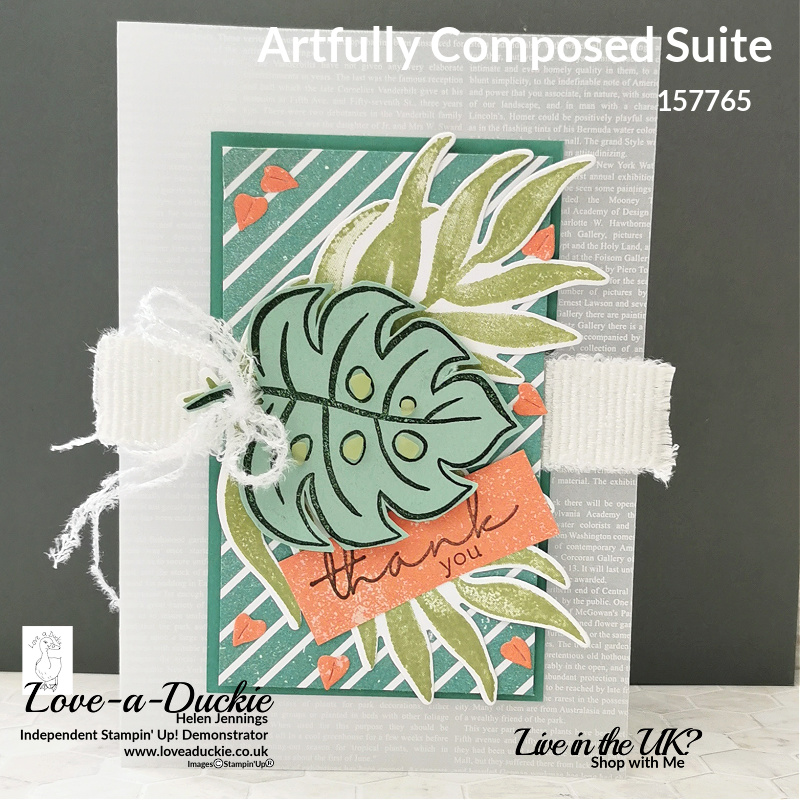
I was really pleased that I managed to use a little bit of everything in the suite in my finished project. It is such a gorgeous collection. If you would like lots more inspiration with this suite, the Creativity Abounds team created a Tutorial Bundle with this Suite and it is available to purchase now.
Don’t hesitate to get in touch if I can help with your purchases, or if you have a crafty question.
Meanwhile stay safe and stay well
Helen xx
If you live in the UK, I would love you to choose me as your demonstrator.
- You can shop here or click on the images listed below.
- sign up for my newsletter to receive news and inspiration
- Find out more about joining my team to get a 20% discount on your craft supplies
- email me if I can be of any assistance.
- Make sure you use the current host code so I can thank you for your order.
- Anyone purchasing from me will receive a Tutorial Bundle as a Thank You.






Your card is very pretty. I love all the colors. It has a very happy feel to it.
Beautiful card. I just love this stamp set