
Here are two different Christmas Cards demonstrating some fun Double Sided Adhesive Sheet techniques with stamped images.

First the main image is stamped onto some Window Sheet with Stazon Ink and then they are coloured on the back with Stampin’ Blends. You need to use these alcohol pens because this enables the colour to dry and stay in place on the window sheet. However, it is important to stamp on one side of the sheet and colour on the other. If not, the alcohol in the outline image will blend with the alcohol in the colours and give a smudged outline.
Poinsettia Card

The Poinsettia image comes from the “Poinsettia Petals” stamp set. Cherry Cobbler, Mossy Meadow and Daffodil Delight Stampin’ Blends have been used to add colour. Next, a piece of Adhesive Sheet is placed over the coloured side.

Take a piece of aluminium foil and scrunch it up lightly and then press it out flat. It will maintain a lot of crinkles.
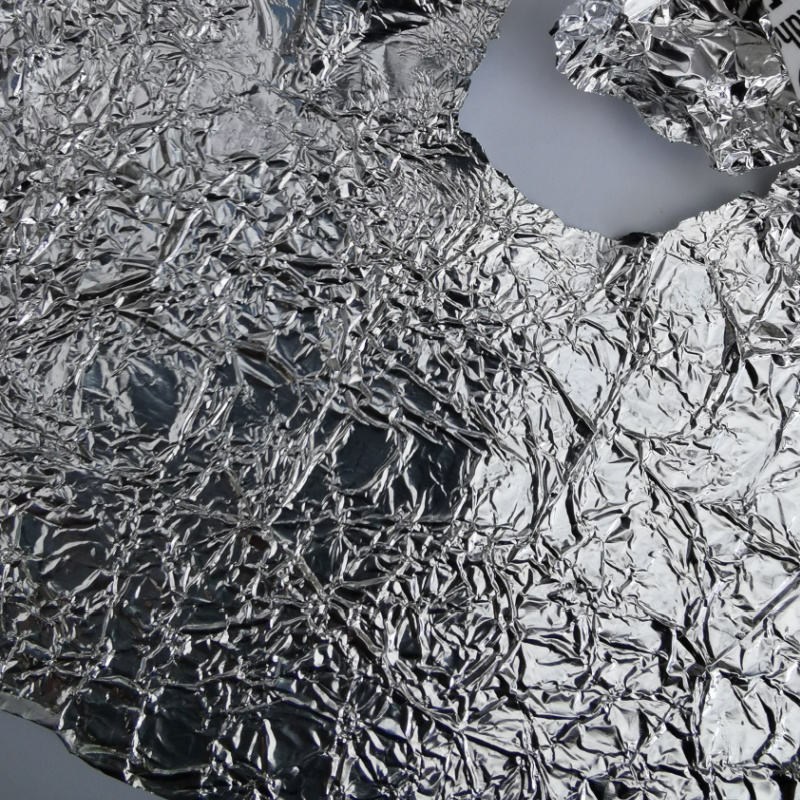
You then need to press this onto the back of the adhesive sheet, rubbing firmly to ensure it is well adhered and then cut out your stamped image.
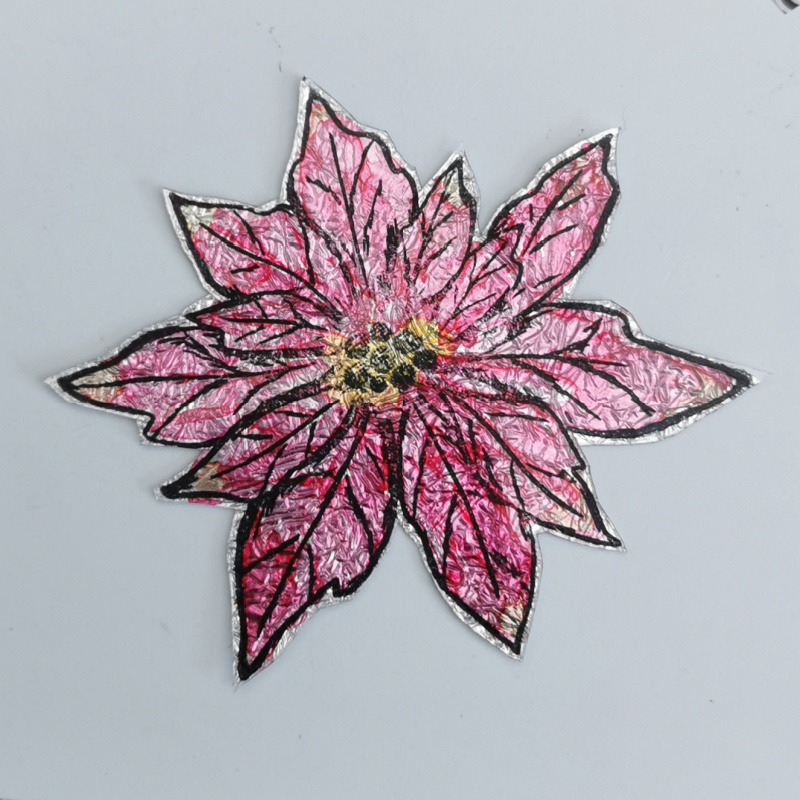
You now have a stained glass effect image ready to add to your project. The following were used to finish this card:
- a die cut label from the Hippo & Friends dies,
- some sprigs punched from gold shimmer vellum
- some Matte Decorative Dots and Designer Series Paper from the Sweet Stockings Suite.

Star Card
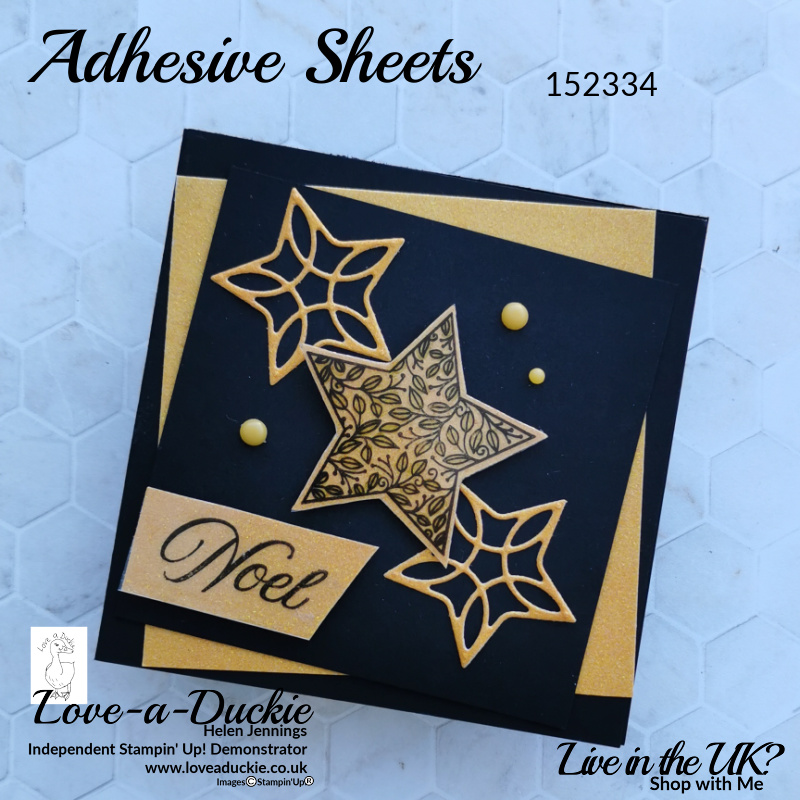
This card features a very similar technique. The card is stamped in Stazon onto wWndow Sheet and then some Mossy Meadow was added to the leaves on the reverse. The adhesive sheet was added to the coloured side, but this time a piece of Mango Melody Ombre Paper was added. This paper has a gorgeous glitter effect. You can also use glitter rubbed into the adhesive sheet to create this effect.
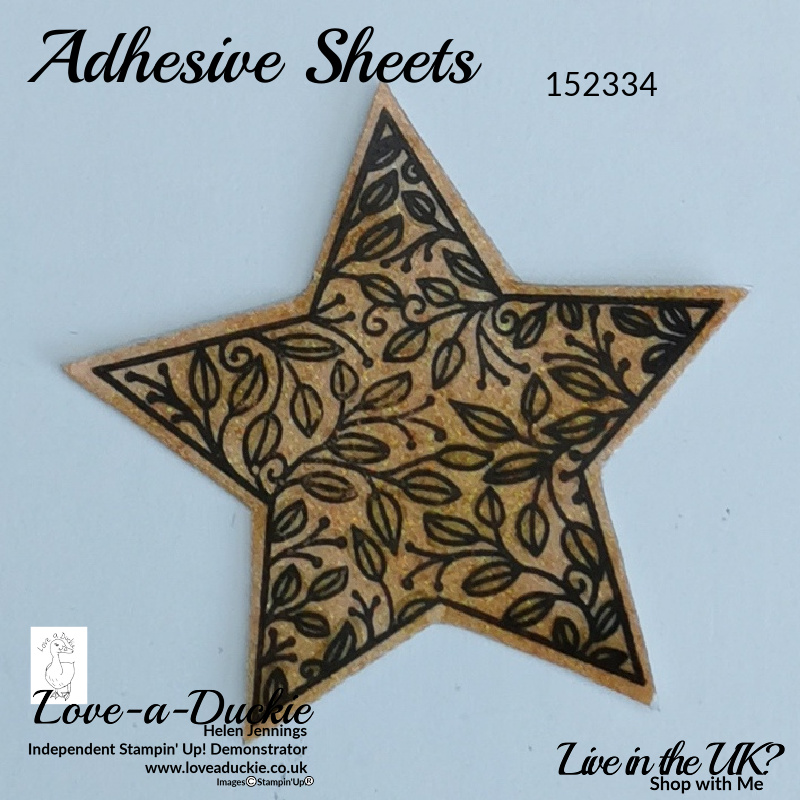
Once cut out the star was added to a card front along with 2 die cut detailed stars from the same Tidings & Trimmings Bundle. Adhesive sheet was added to the back of the ombre paper before cutting the detailed dies. This makes it so easy to add them to your project.
For the sentiment, “Noel” was stamped onto Window Sheet and the paper was added to the back with adhesive sheet. Some more Matte Adhesive Dots were used for this card.

Adhesive Sheet Techniques with Stamped Images
I hope you have enjoyed these cards and that your mind is now buzzing with the different stamp sets and glittery,and textured papers you could used with this idea of combining Window Sheets with Adhesive Sheets to create backgrounds for your stamped images.
Don’t hesitate to get in touch if I can help with your purchases, or if you have a crafty question.
Meanwhile stay safe and stay well
Helen xx
If you live in the UK, I would love you to choose me as your demonstrator.
- You can shop here or click on the images listed below.
- sign up for my newsletter to receive news and inspiration
- Find out more about joining my team to get a 20% discount on your craft supplies
- email me if I can be of any assistance.
- Make sure you use the current host code so I can thank you for your order.
- Anyone purchasing from me will receive a Tutorial Bundle as a Thank You.


")


 Shimmer Vellum")


 Designer Series Paper")
")
 Specialty Paper")