In today’s blog post I am sharing a Christmas Card with Day to Remember stamp set

Each month, the team that brings you the Creative Stampers Tutorial Bundle also brings you these blog posts to give you a flavour of this month’s projects. We can’t show you the tutorial projects, because those are exclusive to those who earn or buy the bundle. However, I can give you a sneak peek of mine.

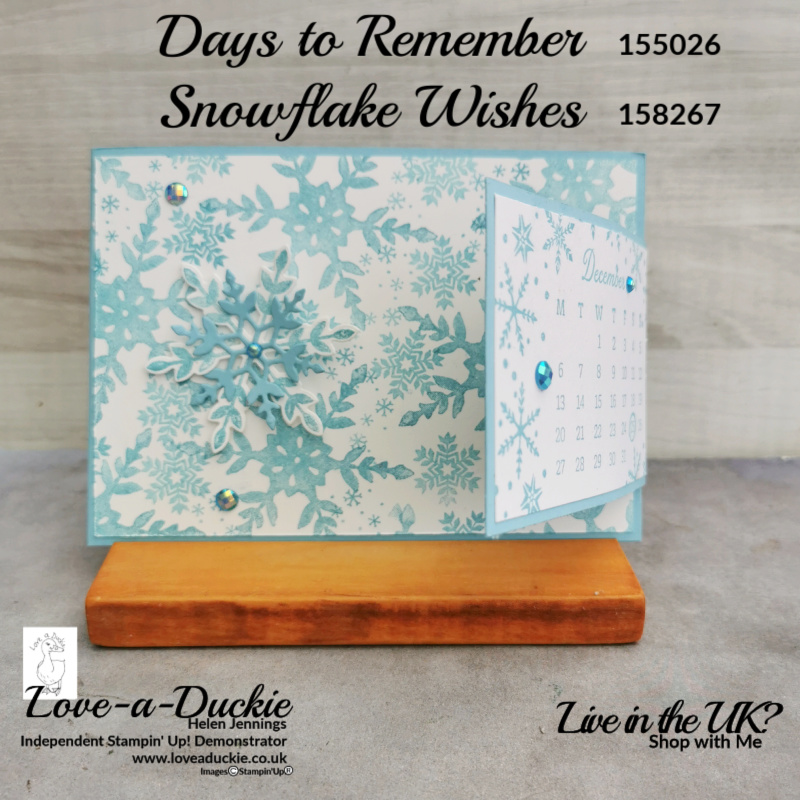
My Christmas Card with Day to Remember
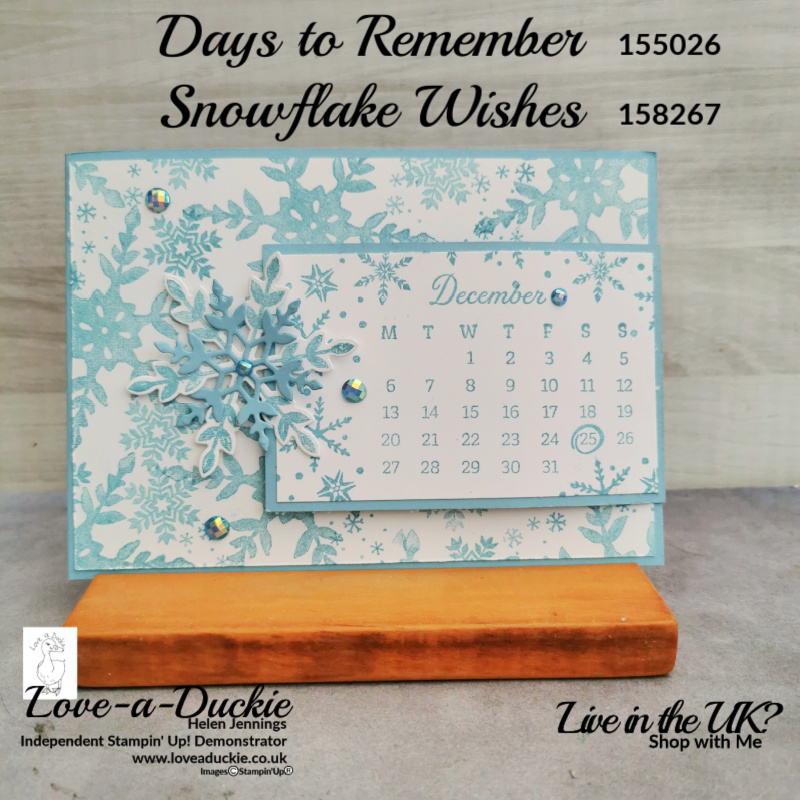
Stamp : Days To Remember Photopolymer Stamp Set (English) [155026] £16.00 , Snowflake Wishes Photopolymer Stamp Set [153444] £24.00
Ink : Balmy Blue Classic Stampin' Pad [147105] £7.00
Card Stock : Balmy Blue A4 Cardstock [147007] £8.25 , Basic White A4 Cardstock [159228] £9.00
Accessory : Blue Adhesive-Backed Gems [153547] £7.50
Die Cut & Emboss : So Many Snowflakes Dies [153560] £33.00
| A4 metric | Imperial Letter Size | |
| Balmy Blue Card base | 10.5cm x 29.7cm Scored at 14.9cm on the long side. | 4 1/4″ x 11″ Scored at 5 1/2″ on the long side. |
| Basic White | 14.4cm x 10cm | 5 1/4″ x 4“ |
| Balmy Blue | 11cm x 6.5cm scored at 10cm on long side | 4 1/2″ x 2 5/8″ Scored at 4″ on long side |
| Basic White | 9.5cm x 6cm | 3 3/4″ x 2 3/8″ |
| Basic White Insert | 14.4cm x 10cm | 5 1/4″ x 4“ |
Instructions
- Fold the card base along the score line.
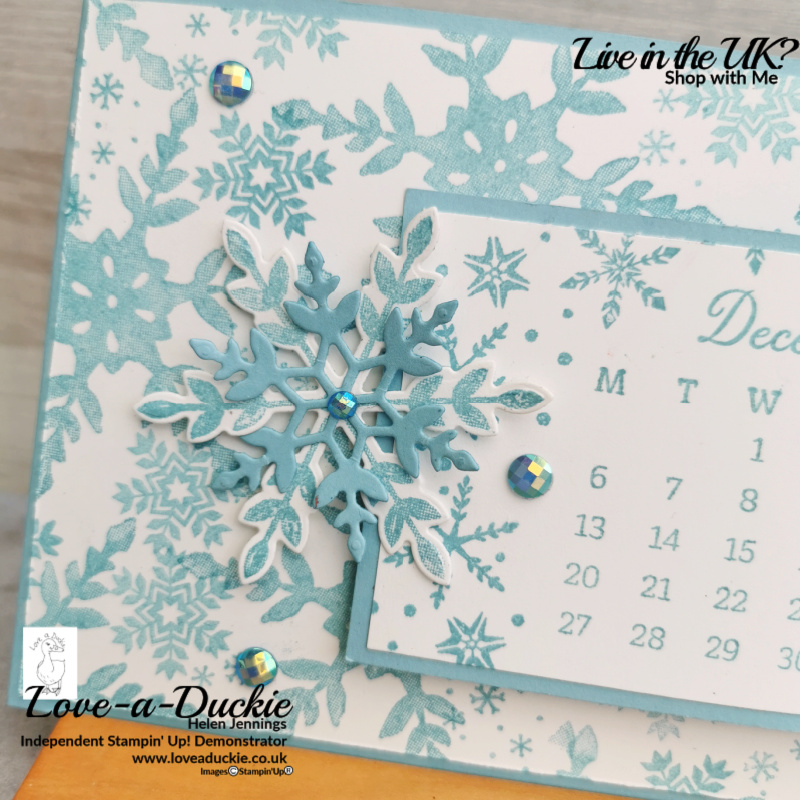
- Using balmy Blue inks and a variety of snowflake stamps, stamp a background on the Basic White mat. Stick this mat to the card front.
- Stamp the Demember month onto the small mat of Basic White. For 2021, December 1st is on a Wednesday. This very clever stamp set is designed so that the width of our ink pads perfectly inks up the range of dates you need for any one month. Because here in the UK, our calendars normally start on Monday, I needed to ink between 6 on the left and 5 on the left. If your calendar starts on a Sunday, you would need 5 on the left and 4 on the right.
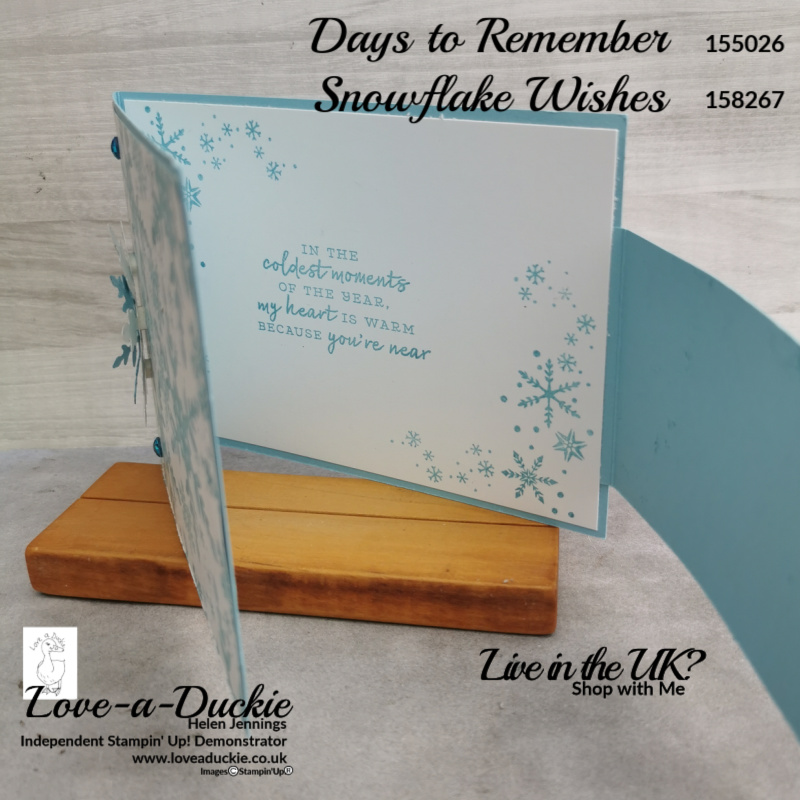
- Stick this mat to the Balmy Blue mat. Add some adhesive to the flap on this piece and attach to the inside right hand edge of the card.
- Stamp the large snowflake on some Basic White card and then die cut this and a Balmy Blue Snowflake. Stick them together in the centre.
- Add dimensionals to the centre and one half of the snowflake as shown.
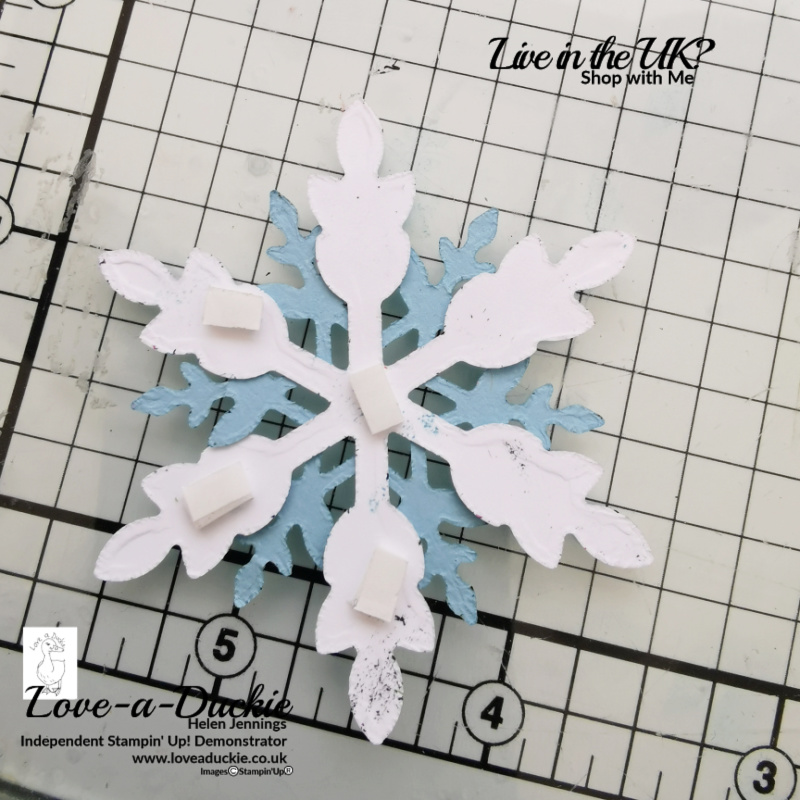
- Shut the flap over the card front and then position the snowflake so it acts as a closure..
- Add some blue gems to the card front
- Stamp a greeting and some snowflakes on the card insert and stick it to the inside of the card, covering the tab from the front panel.
Let’s Hop
I hope you have enjoyed my project. Do leave a comment if you can, because it certainly makes my day. Then it is time to hop around all the other projects

How Can I Help?
The weather here is actually quite warm here at the moment, but I hope you have still managed to get a little bit of festive inspiration from our Blog Hop. If you would like to purchase our Creative Stampers Tutorial Bundle featuring even more Christmas inspiration, message me. Alternatively you can earn it for free with me if you live in the UK. Simply place an online order, or join my team.
Meanwhile stay safe and stay well
Helen xx
If you live in the UK, I would love you to choose me as your demonstrator.
- You can shop here or click on the images listed below.
- sign up for my newsletter to receive news and inspiration
- Find out more about joining my team to get a 20% discount on your craft supplies
- email me if I can be of any assistance.
- Make sure you use the current host code so I can thank you for your order.
- Anyone purchasing from me will receive a Tutorial Bundle as a Thank You.
