I am sharing this fancy Fold Bridge card that was created by Robin Messenheimer, a member of the Blog Co-Op. i am sharing her article here – even though it is hardly hot in the UK at the moment. Typical British Summertime.
Cool Snowflakes on a Hot Summer Day
I really do love thinking about Christmas during the summer, mostly because it’s hot now (at least in the Northern Hemisphere) and thinking about having snow at Christmas time does just a little to cool me off. So, what better time to start making Christmas cards than right now!
A Returning Oldie but Goldie Stamp Set and Dies
Stampin’ Up! first introduced the Snowflake Wishes Stamp Set in its 2020 August – September Mini Catalogue. I was very happy when Stampin’ Up! announced at the end of that Mini Catalog that this stamp set, and its coordinating So Many Snowflakes dies were going to be continued in the 2021 Annual Catalogue. And that’s where you can find them today. Who knows – you may even be able to find them in your own stash of stamps and dies.
A Fresh Look at Snowflake Wishes With a Fun Fold Bridge Card
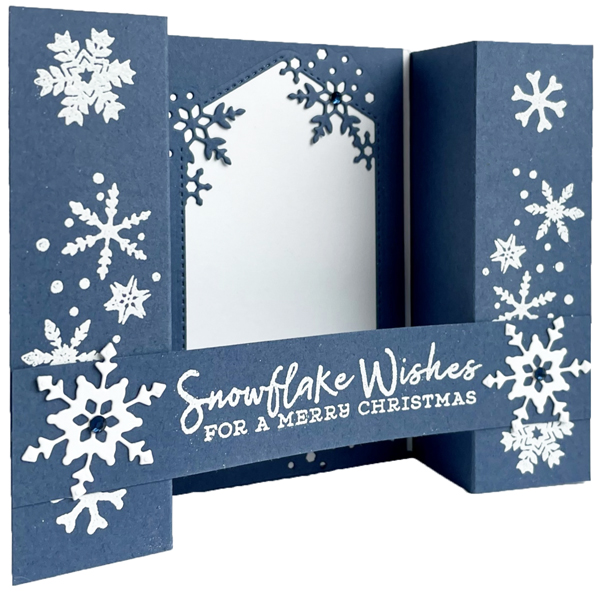
Last year I loved making cards with the Snowflake stamp set and the 2020-2022 In Color, Misty Moonlight. That colour appeals to me much more than Night of Navy, just because it is a bit lighter and to me looks more, well, blue. So, I started this year’s project knowing that I wanted to do something new with my favourites from last year.
After not too much time spent looking around for ideas, I decided that I’d try a Bridge Card for this project. The title sentiment in the stamp set would be perfect for a strip that “bridges” the two outside sections that are formed by that fold.
A Fancy Fold Bridge Card is SO Easy to Make
You won’t believe how quick and easy the instructions for the basic card are. This particular card is a card that, when folded, is 10.5cm/ 4-1/4” high by 14.6cm/5-1/2” wide – perfect for an C6/A2 sized envelope.
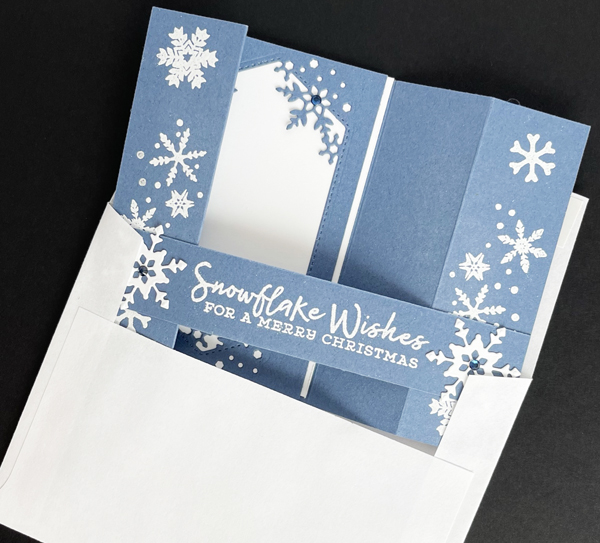
Here are the sizes of the two pieces of cardstock that form the card:
• 20.5cm x 10.5cm / 8” x 4-1/4”
• 14.6cm x 2.5cm / 5-1/2” x 1” (if you have a sentiment that’s taller, you can always make this a bit wider than 2,5cm /1”)
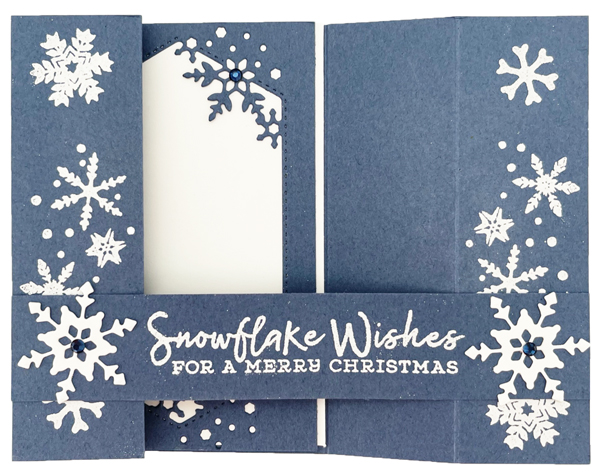
And here are the instructions:
- Score the card base along the long side at 3cm/1-1/4” and 6cm /2-1/2” from each end.
- Create Mountain Folds at the 3cm /1-1/4” score lines and Valley Folds at the 6cm /2-1/2” score lines.
- Adhere the left end of the sentiment strip to the left front section of the card about 1.5cm /1/2″ up from the bottom of the card.
- Fold the left section with the strip adhered to it flat onto the main section of the card base. Then adhere the right end of the strip to the rightsection of the card.
Unfold the left section of the card and the “bridge” card is done!
Decorating the Card
First of all, as you probably have already guessed, do all the stamping BEFORE you put the card together.
For this card, I stamped snowflakes from the stamp set on both the left and right 1-1/4” sections using VersaMark and then embossing them with the White Stampin’ Emboss Powder from the Basics group of embossing powders. I stamped the sentiment onto the bridge strip the same way. Then I added a die-cut snowflake to both ends of the bridge.
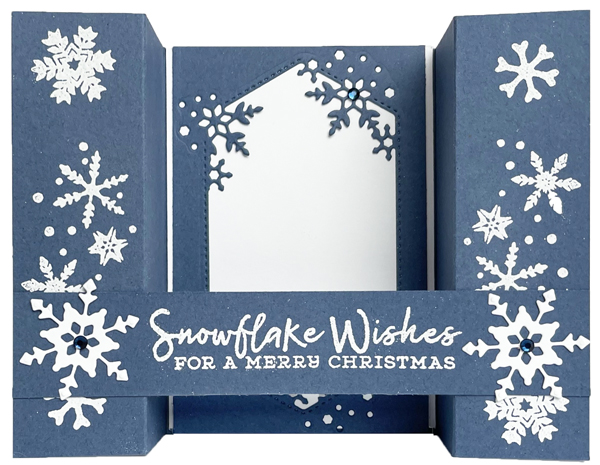
For the inside, I added a 7.5cm x 10cm / 3” x 4-1/4” piece of Basic White Cardstock to the centre section of the card. Then I adhered a section that I had die-cut from Misty Moonlight Cardstock using the label-shaped die in the die set.
And Don’t Forget the Envelope!
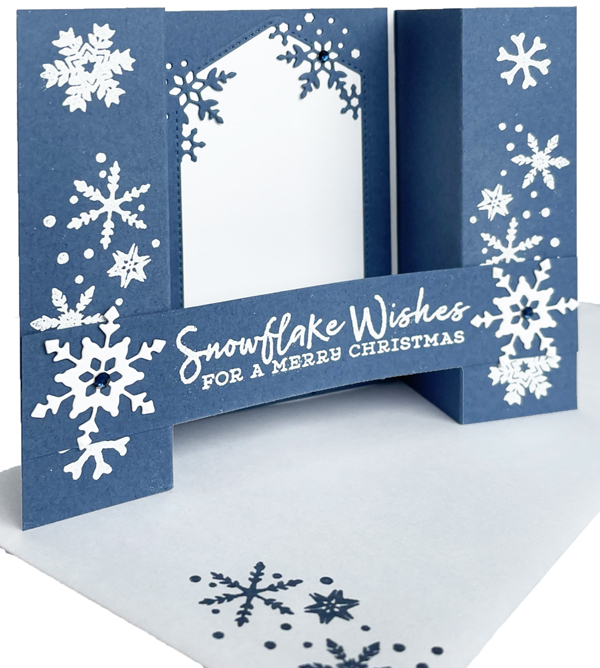
Especially at Christmas time, it’s just too much fun to stamp your envelopes. With all the snowflake images in this stamp set it’s so easy to find one that’s just perfect for what you like to put on an envelope. The stamp I like best is the one that has several small snowflakes. It’s almost like it’s made to go on an envelope!
How Can I Help?
If you are enjoying Fun Folds with snowflakes, why not go back and check a fancy fold card using this set from last year. the paper may no longer be available, but why not stamp your own background.
Do share the projects you are inspired to create with these snowflakes.
Meanwhile stay safe and stay well
Helen xx
If you live in the UK, I would love you to choose me as your demonstrator.
- You can shop here or click on the images listed below.
- sign up for my newsletter to receive news and inspiration
- Find out more about joining my team to get a 20% discount on your craft supplies
- email me if I can be of any assistance.
- Make sure you use the current host code so I can thank you for your order.
- Anyone purchasing from me will receive a Tutorial Bundle as a Thank You.
