On today’s blog I am sharing how to create a diorama card using the Charming Duck Pond Bundle as well as another great card. These ducks are fabulous for all ages and for both the guys and the girls. This is my card for the Creativity Abounds Blog Hop and we are concentrating on masculine cards.

The Creativity Abounds Design Team are a group of very keen Stampin’ Up!® Demonstrators from all around the world that are coming together to share our creative ideas with you. We are happy that you can join us and hope that we can Inspire you to make creations of your own.
You may be starting here or have come from someone else’s blog – either way there is a list at the end of this post to help you move around all the different blogs and get many amazing ideas. We all have our country listed – so if you are looking for a demonstrator in your country, then these demonstrators would love to look after you with your Stampin’ Up!® shopping or if you would like to join our Stampin’ Up!® teams.
These monthly blog hops also introduce you to our latest Tutorial Bundle containing lots of different inspiring projects.
How to Create a Diorama Card
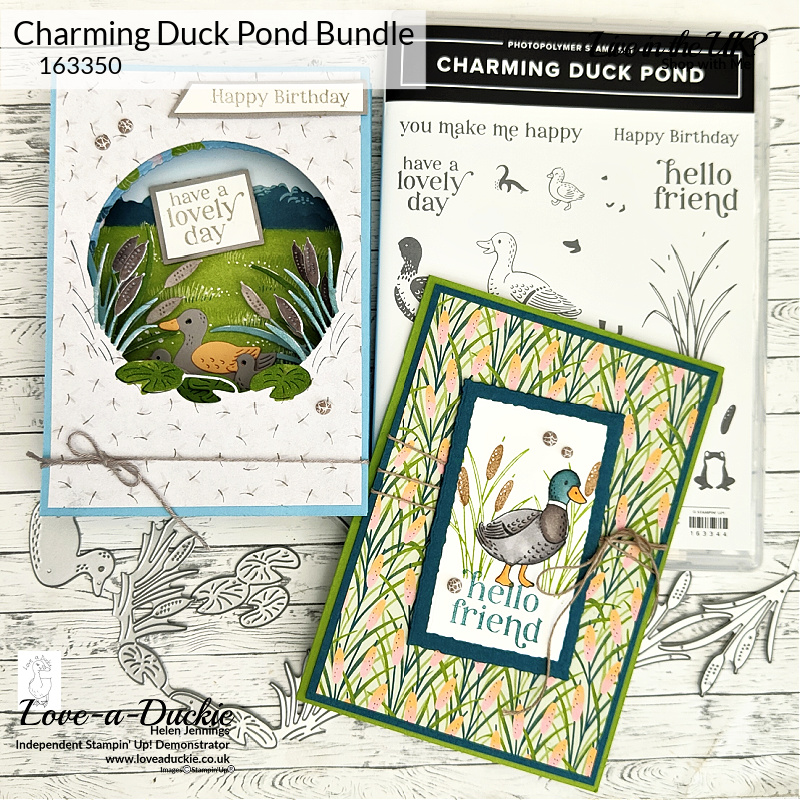
When your business is called Love-a-Duckie, it is inevitable that you will be drawn to the Lily Pond Lane Suite. The papers have such a gorgeous colour palette and I love how the use of Pretty in Pink and Peach Pie add such vibrancy.
This pop of colour doesn’t mean that this Suite is strictly for the girls. Far from it. If your man enjoys bird watching, or sitting by the water then this suite is obviously going to have appeal. I may be biased, but how can anyone fail to smile at a duck card.
Creating a Scene
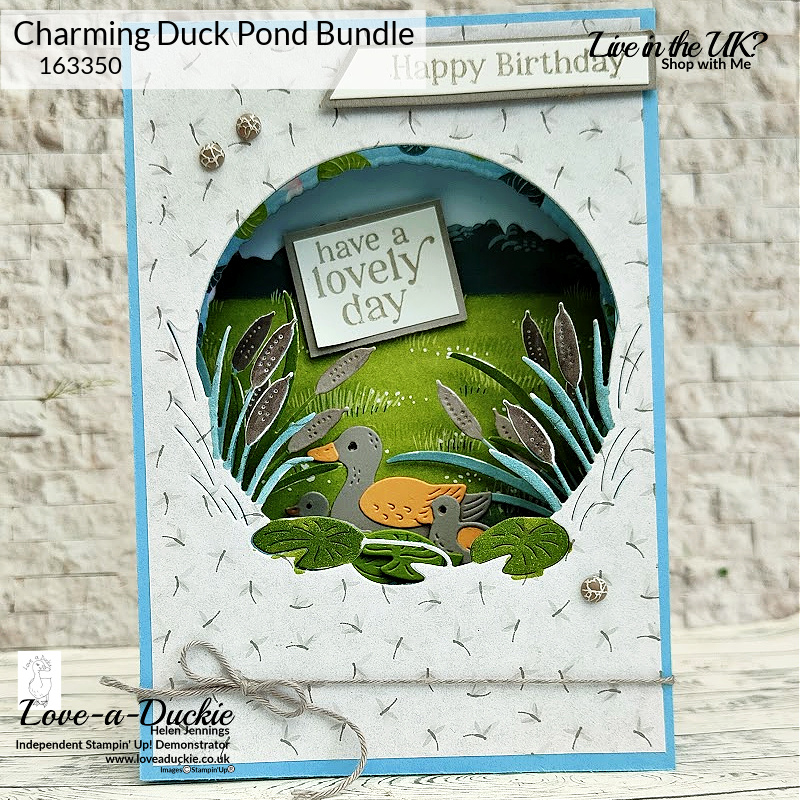
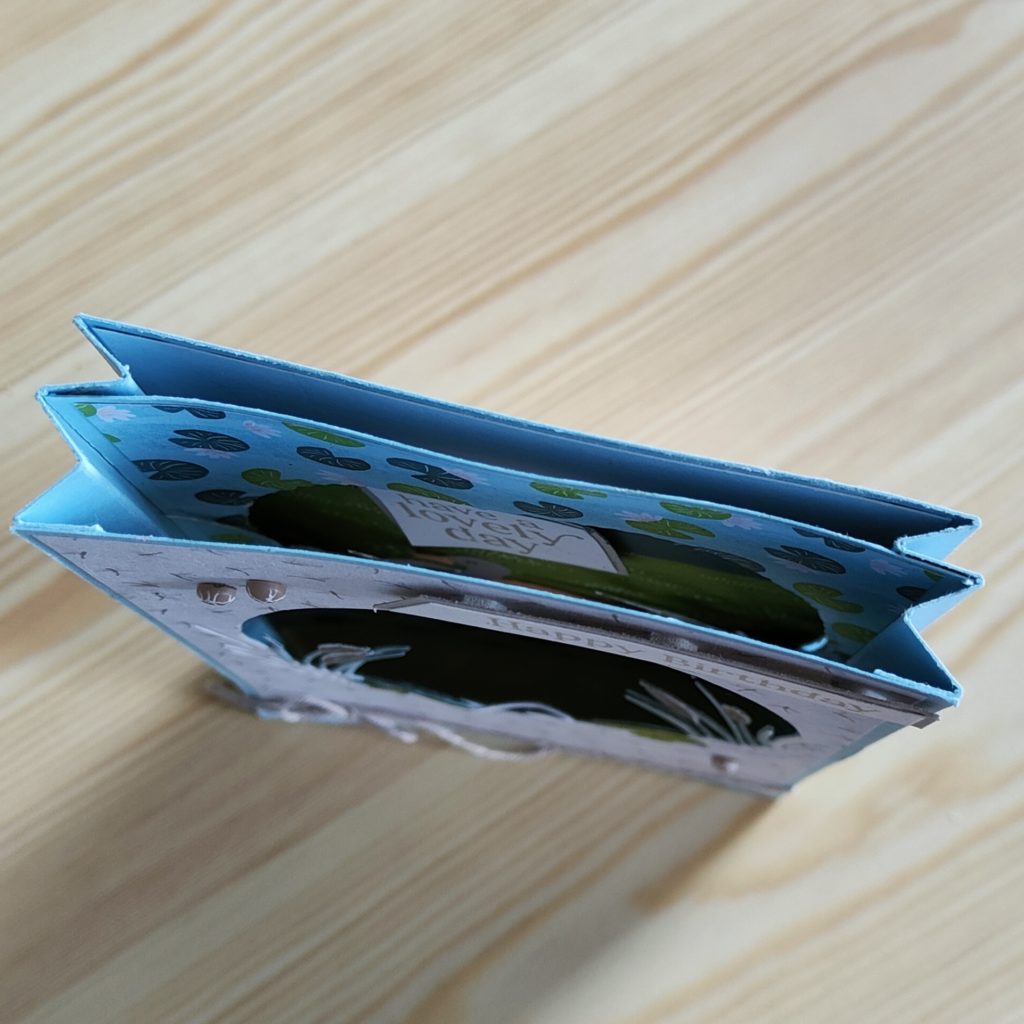
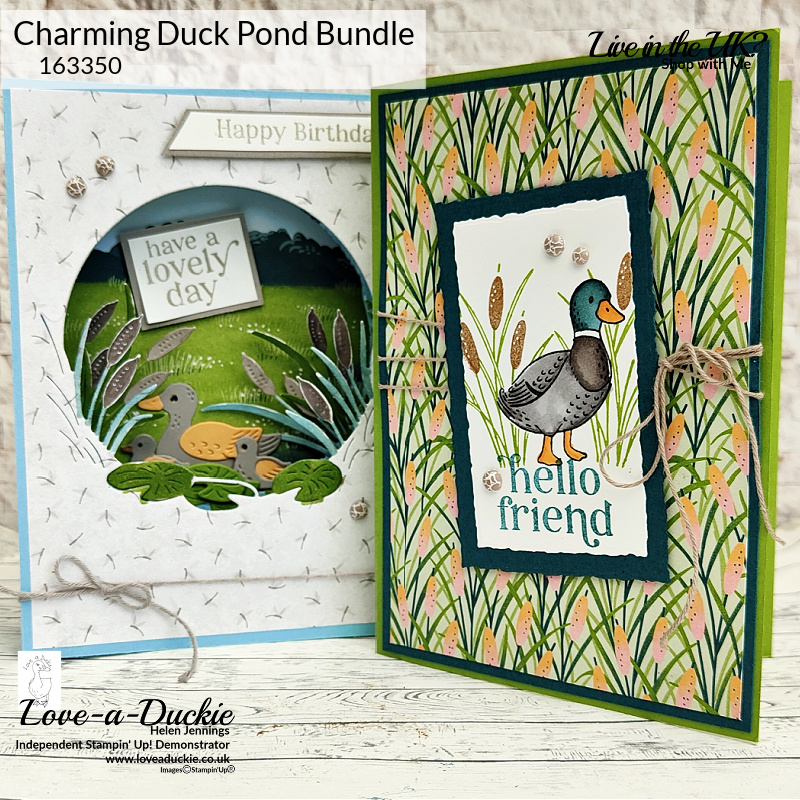
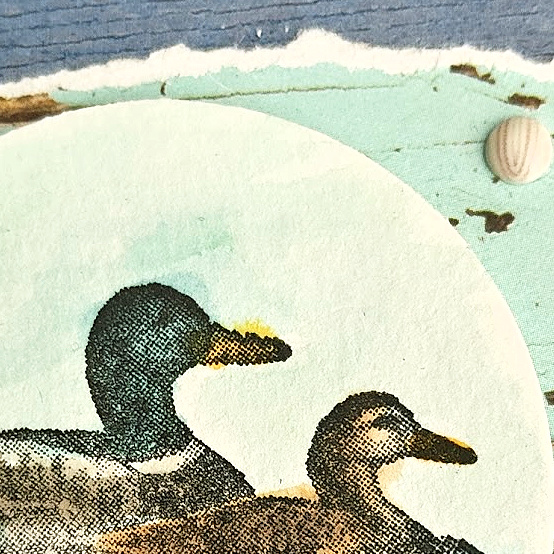
This lovely card creates a peephole into the ducks world. The use of the die cut from the bundle to create this feature aperture on the top layer and additional bulrushes on the middle layer, creates the interest and depth you want from these types of cards.
The basic measurements for the card pieces and DSP for the Diorama were:
| Metric | Imperial | |
| Front Layer | 14.9cm x 10.5cm DSP 14.4cm x 10cm | 5 1/2″ x 4 1/4″ DSP 5 1/4″ x 4″ |
| Middle Layer | 14.7cm x 10.5cm DSP 14.2cm x 10cm | 5 3/8″ x 4 1/4″ DSP 5 1/8″ x 4″ |
| Back and sides | 14.9cm x 20.5cm DSP – 14.4cm x 10cm | 5 1/2″ x 8″ DSP 5 1/4″ x 4″ |
Instructions
Score the back section of card at 1cm, 2cm ,3cm,4cm,5cm,15.5cm, 16.5cm, 17,5cm, 18,5cm and 19,5cm
For Imperial card score at 3/8″, 3/4″, 1 1/8″, 1 1/2″, 1 7/8″, 6 1/8″, 6 1/2″, 6 7/8″, 7 1/4″, 7 5/8″,
Once scored concertina the sides up.
Stick all of the DSP to their corresponding mats.
Use the circle aperture die from the Charming Duck Pond Bundle to cut the hole in the front panel . The middle panel has an aperture cut with the 7th largest Deckled Circle die, using the front panel to help line it up.
Then the bulrushes and the lily pads on the front panel are coloured with Stampin Blends. Next, wrap some Gray Granite twine around it and adhere to the back. Add a bow of twine stuck on the front with dimensionals.
Die cut a duck and 2 ducklings from Gray Granite and Peach Pie card and layer the pieces. A Black Stampin’ Write marker is used to create the eye. Cut a trio of lily pad leaves from Granny Apple Green card 4 bulrushes die cut in white (2 pairs). The bulrushes are coloured with Stampin’ Blends, using Pretty Peacock for one pair and Granny Apple Green for the other. Add these bulrushes to the middle layer.
Construct the Layers
Adhere the middle layer to the centre of the concertina as shown . The duck family can then be stuck in place on the back panel so they are peeping from between the bulrushes. Then add the lily pads in front of the ducks. Finally add he front panel to the front of the concertina.
I added a sentiment to both the front and the inside of the card. These were both stamped in Gray Granite onto Basic White card and matted with Gray Granite card.
Finally add some Self-adhesive Dappled Dots.
Another Duck Card
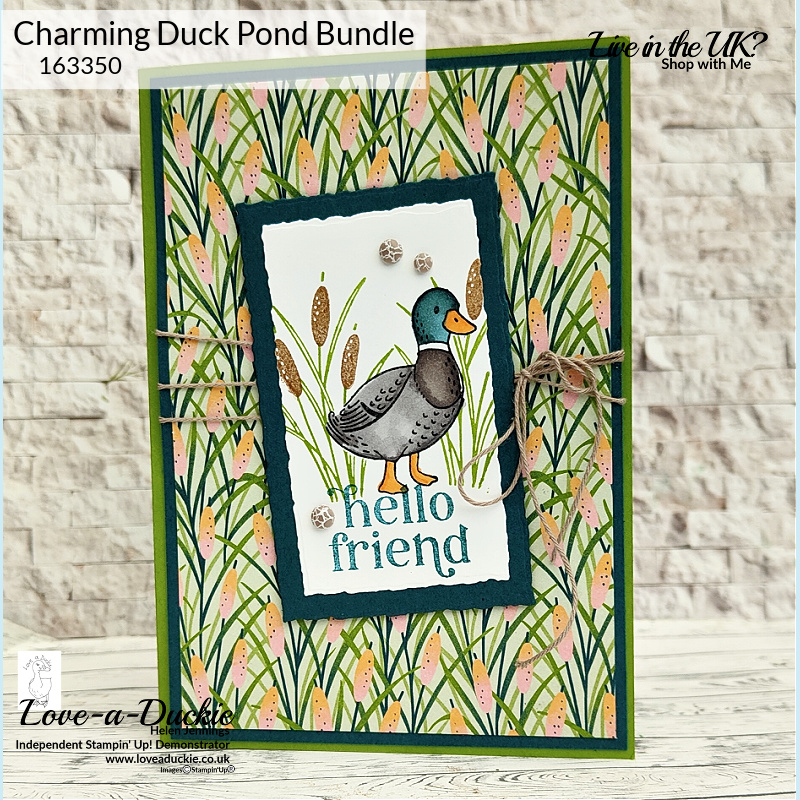
This second card features some vibrant bulrush paper from the Suite on a Pretty Peacock mat and a Granny Apple Green card base.
Stamp the duck onto a Deckled Rectangle and then mask, before adding bulrushes. Once the mask is removed the duck is coloured with Stampin’ Blends to produce this striking Mallard Duck.
This handsome young man is accompanied by some Crumb Cake twine and some more Dappled Dots.
Video
You can see both of these cards being created on this video.
Let’s Hop
I hope you have enjoyed my project. Do leave a comment if you can, because it certainly makes my day. Then it is time to hop around all the other projects

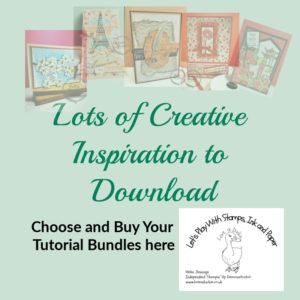
How to Get The Tutorial Bundle
I hope you have been inspired during this hop. This project is exclusive to the blog hop, but there is lots more inspiration in the Tutorial Bundle. If you earn or buy the bundle, you will receive a PDF that will contain all the information you need to create the projects shown in the thumbnails yourself, including the products used, the measurements and detailed instructions. You can get your hands on these tutorials in a couple of ways.
- Receive it free with any purchase from me.
- Buy it from the Downloads section of my shop
- Receive it as a Member of my team
How Can I Help?
Customers are always asking for Masculine Card idea, so I’m sure this tutorial is going to be a winner.
My project in this bundle also featured a duck, but a very different style of duck. Here is a sneak peek,
Don’t hesitate to get in touch if I can help with your purchases, or if you have a crafty question.
Meanwhile stay safe and stay well
Helen xx
If you live in the UK, I would love you to choose me as your demonstrator.
- You can shop here or click on the images listed below.
- sign up for my newsletter to receive news and inspiration
- Find out more about joining my team to get a 20% discount on your craft supplies
- email me if I can be of any assistance.
- Make sure you use the current host code so I can thank you for your order.
- Anyone purchasing from me will receive a Tutorial Bundle as a Thank You.


")
 Designer Series Paper")


Very sweet cards, Helen. I can see that you’d be drawn to the duck set. The instructions for the diorama looks great – I might file them for future reference. Thank you. 🙂
What a great card. I love the diaroma effect of it. Thanks for the inspiration and sharing!
Such a fun card! Love it and the ducks are perfect for you!