Learn How To Create A Sliding Triangle Gift Bag on this blog hop with the Creativity Abounds Team.

The Creativity Abounds Design Team are a group of very keen Stampin’ Up!® Demonstrators from all around the world that are coming together to share our creative ideas with you. We are happy that you can join us and hope that we can Inspire you to make creations of your own.
You may be starting here or have come from someone else’s blog – either way there is a list at the end of this post to help you move around all the different blogs and get many amazing ideas. We all have our country listed – so if you are looking for a demonstrator in your country, then these demonstrators would love to look after you with your Stampin’ Up!® shopping or if you would like to join our Stampin’ Up!® teams.
These monthly blog hops also introduce you to our latest Tutorial Bundle containing lots of different inspiring projects.
How To Create A Sliding Triangle Gift Bag
Instructions
Here are the measurements you need –
Cardstock – 9.5″ x 12″ (24cm x 30cm)
Score long side at 4″ and 8″ (10cm and 20cm)
Score short side at 4″ and 5.5″ (10cm and 14cm)
DSP – 4″ x 10.5″ (10cm x 27cm)
Score long side at 1″ (2.5cm)
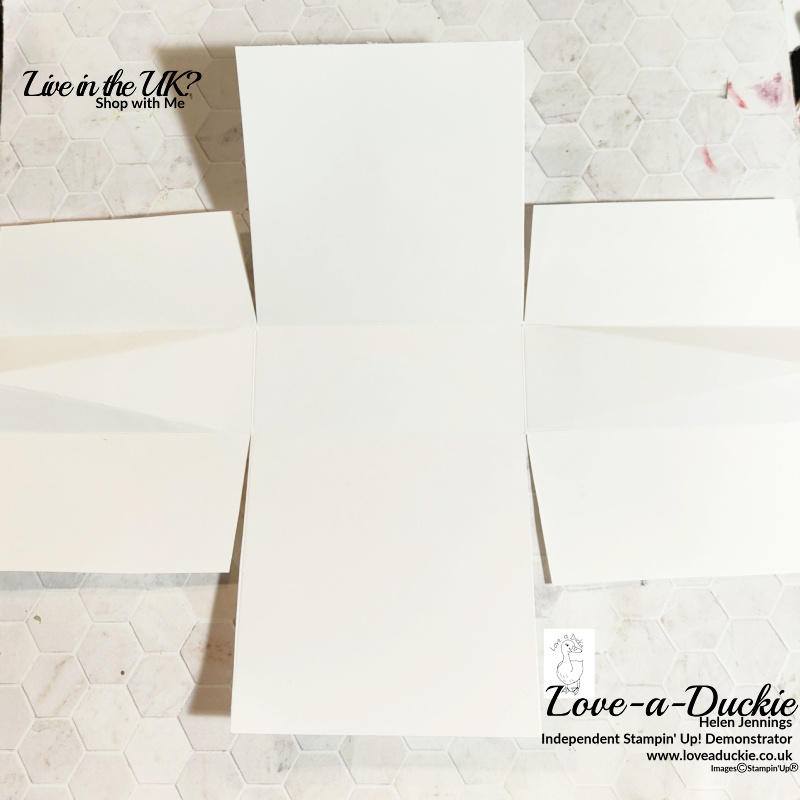
On the short side, make a mark at the 12cm point and then score diagonally from this mark out to the two corners of that small 4cm x 10cm rectangle and then repeat on the other short side.
Cut down the 10cm score lines on the long side until you meet the horizontal score lines. Trim off some excess cardstock and then cut some narrow wedges either side of these tabs. See the picture for illustration.
Add glue to the tabs and stick them in pace. Squeeze in the side panels to create the triangle.
Take the DSP and lying the scored piece on the bottom of the bag, wrap the DSP around the box and then stick the end to this bottom flap to create a sleeve.
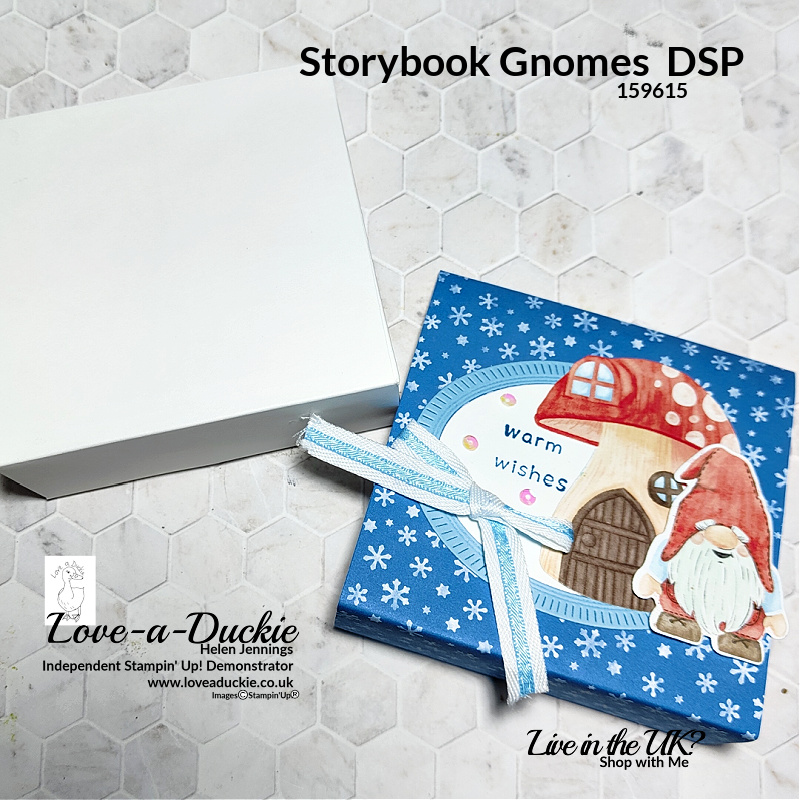
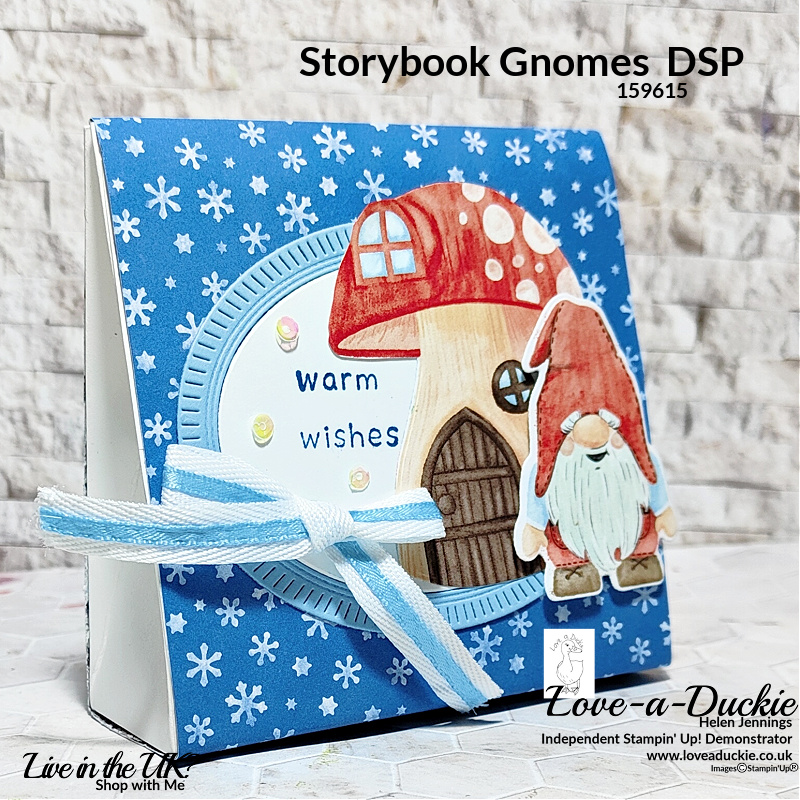
This bag was decorated with a die cut oval from the Fitting Florets Collection and a Toadstool and Gnome, both cut from the DSP.
A bow of Balmy Blue & White ribbon and some sequins were used to embellish the bag.
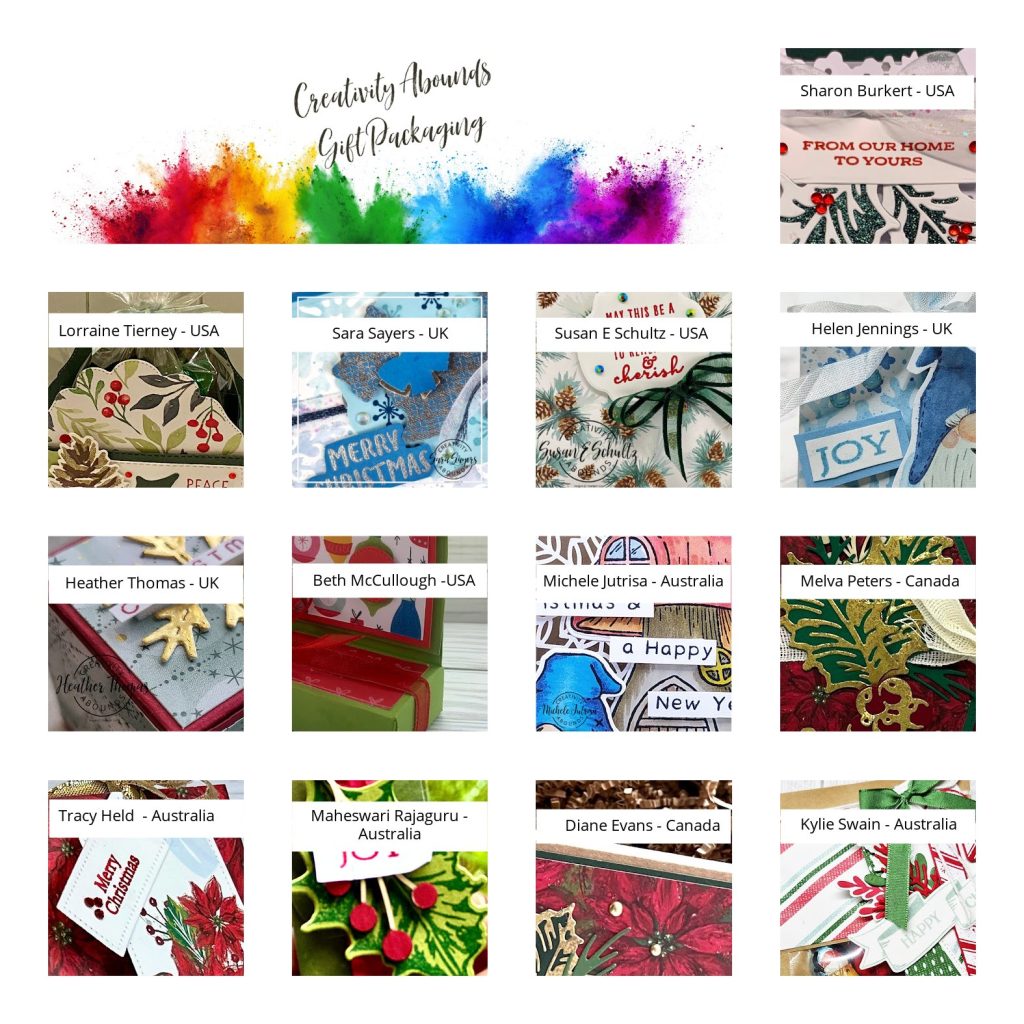
Let’s Hop
I hope you have enjoyed my project. Do leave a comment if you can, because it certainly makes my day. Then it is time to hop around all the other projects

How to Get The Tutorial Bundle
I hope you have been inspired during this hop. This project is exclusive to the blog hop, but there is lots more inspiration in the Tutorial Bundle. If you earn or buy the bundle, you will receive a PDF that will contain all the information you need to create the projects shown in the thumbnails yourself, including the products used, the measurements and detailed instructions. You can get your hands on these tutorials in a couple of ways.
- Receive it free with any purchase from me.
- Buy it from the Downloads section of my shop
- Receive it as a Member of my team
How Can I Help?

As you get ready to gift wrap your Christmas Presents, I hope you have found some good ideas in this hop.
Don’t hesitate to get in touch if I can help with your purchases, or if you have a crafty question.
Meanwhile stay safe and stay well
Helen xx
If you live in the UK, I would love you to choose me as your demonstrator.
- You can shop here or click on the images listed below.
- sign up for my newsletter to receive news and inspiration
- Find out more about joining my team to get a 20% discount on your craft supplies
- email me if I can be of any assistance.
- Make sure you use the current host code so I can thank you for your order.
- Anyone purchasing from me will receive a Tutorial Bundle as a Thank You.


I can’t wait to make this!
Love your project Helen! Those gnomes are so adorable!
Love this gift bag Helen.
What fun project! Love it!
I love this bag, Helen!