

The project is part of the monthly Technique Tuesday Blog Hop from the Crafty Collaborations community, a diverse group of Stampin’ Up! Demonstrators from around the world who come together to share inspiration with you.
The theme this month iis Technique of Choice and I can’t wait to see all the other ideas that my fellow demonstrators have come up with
Ink Blending with Masks
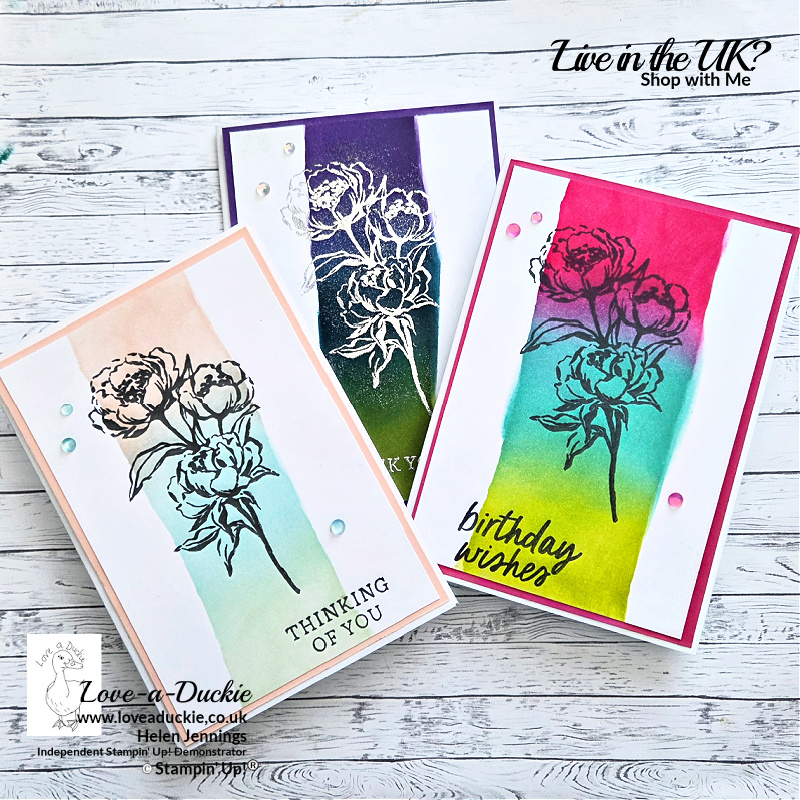
For this blog hop, I’ve chosen to focus on ink blending with masks – a versatile technique that can be adapted to suit many card-making styles.
In this post, I’ll demonstrate how one technique can be used to create three different card designs simply by changing colour choices and layout.
4
🧰 Materials
- White cardstock (for card bases and panels)
- Ink pads in coordinating colours
- Blending brushes or sponges
- Masking paper
- Stamps and sentiment dies
- Adhesive
- Embellishments
✂️ Technique Steps: Ink Blending with Masks
Step 1: Prepare the Card Panel
Cut a piece of white cardstock slightly smaller than your card base.
This allows you to work freely with ink blending and gives a clean border once mounted. You can also add an additional coloured layer, as I have done.
Step 2: Create the Mask
Using masking paper or a sticky note, die-cut or tear a simple shape. I just tore 2 strips from a sheet of masking paper.
Position the mask onto the cardstock panel, pressing it down firmly around the edges to prevent ink seeping underneath.
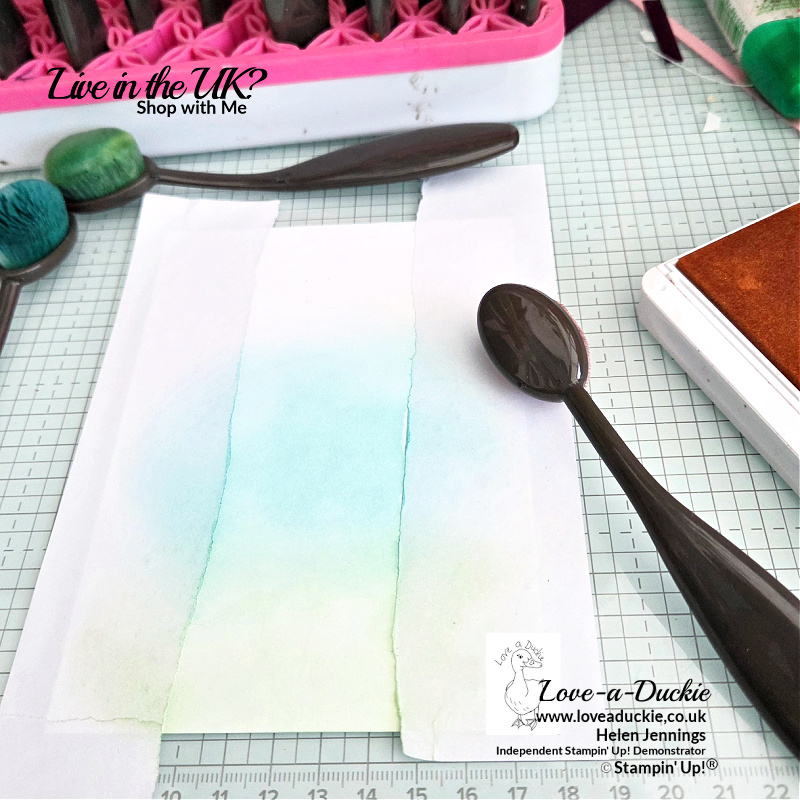
Step 3: Apply the Ink
Using a blending brush or sponge, apply ink in a circular motion, starting off the edge of the card and working inward.
Build the colour gradually for a smooth blend.
Step 4: Remove the Mask
Carefully peel away the mask to reveal the crisp, un-inked area beneath.
This contrast is what gives the technique its impact.
🎨 Design Variations
Card 1: Soft and Subtle
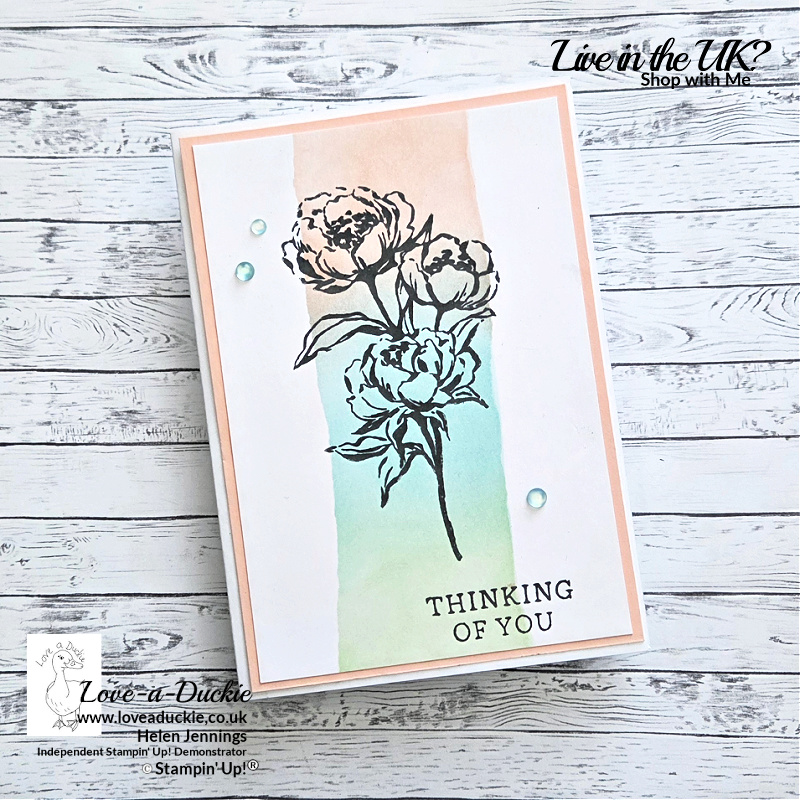
- Use light, pastel inks
- Keep blending gentle and minimal
- Add a small sentiment and leave plenty of white space
Ideal for sympathy or “thinking of you” cards.
Card 2: Bright and Cheerful
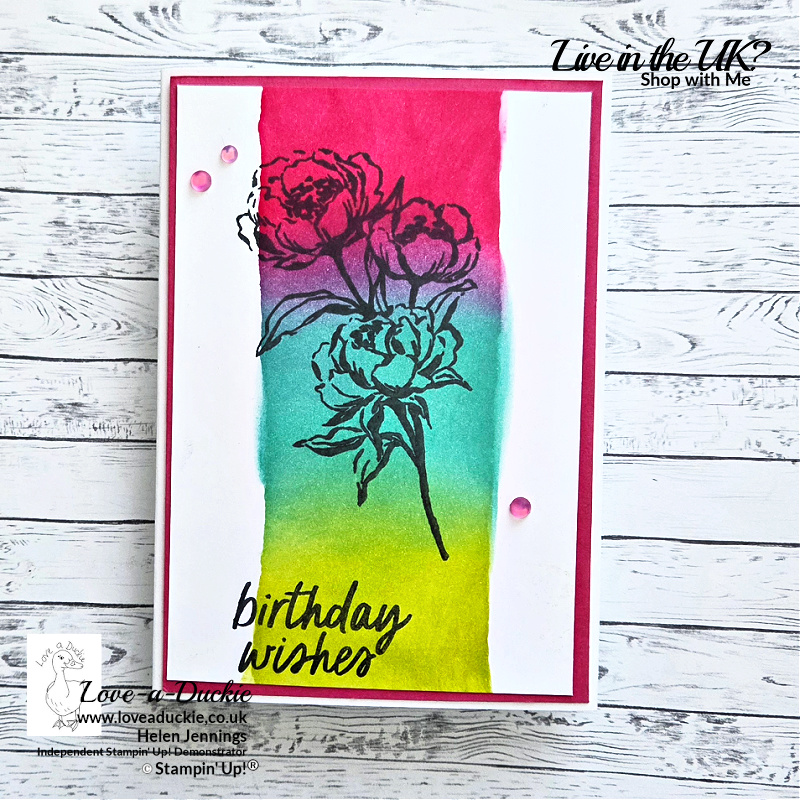
- Choose bold, contrasting colours
- Blend more heavily to create depth
- Add a playful sentiment and minimal embellishment
Perfect for birthdays or celebrations.
Card 3: Deep and Dramatic
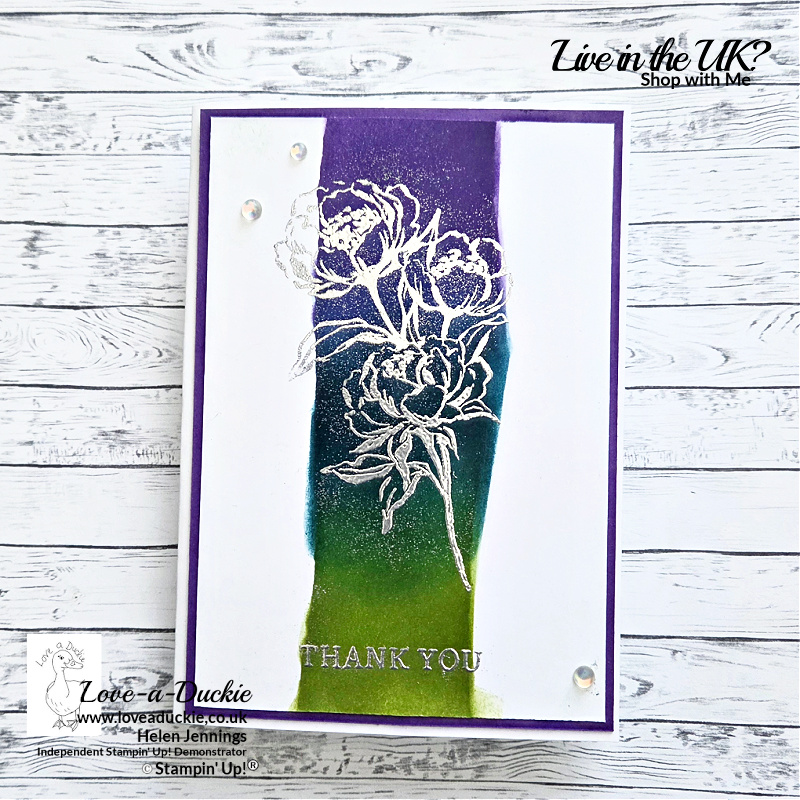
- Select darker ink shades
- Layer colours for a richer background
- Finish with heat-embossed sentiments or metallic accents
If using embossing powder you need to make sure the ink background is thoroughly dry. Despite giving the inked panel a burst with my heat tool and using my embossing buddy, I still had some silver splatters in the background. I don’t dislike them , so it wasn’t consigned to the bin!
Well suited to thank-you or encouragement cards.
✅ Key Tips
- Always start blending off the cardstock to avoid harsh lines
- Use low-tack masking products to protect the paper surface
- Clean blending brushes between colours to maintain clarity
✨ Technique Summary
Ink blending with masks is a reliable, adaptable technique that works across many styles and occasions.
By changing colour and layout alone, you can achieve a wide variety of looks without changing your process.
Let’s Hop
I hope you have enjoyed my project. Do leave a comment if you can, because it certainly makes my day. Then it is time to hop around all the other projects
How Can I Help?
Don’t hesitate to get in touch if I can help with your purchases, or if you have a crafty question.
Meanwhile stay safe and stay well
Helen xx
If you live in the UK, I would love you to choose me as your demonstrator.
- You can shop here or click on the images listed below.
- sign up for my newsletter to receive news and inspiration
- Find out more about joining my team to get a 20% discount on your craft supplies
- email me if I can be of any assistance.
- Make sure you use the current host code so I can thank you for your order.
- Anyone purchasing from me will receive a Tutorial Bundle as a Thank You.


![Gallery Blooms Photopolymer Stamp Set [ 165211 ]](https://assets1.tamsnetwork.com/images/EC042017NF/165211s.jpg "Gallery Blooms Photopolymer Stamp Set [ 165211 ]")
![Simply Said Mix & Match Photopolymer Stamp Set (English) [ 163756 ]](https://assets1.tamsnetwork.com/images/EC042017NF/163756s.jpg "Simply Said Mix & Match Photopolymer Stamp Set (English) [ 163756 ]")
![Stampin' Up! Masking Paper [ 155480 ]](https://assets1.tamsnetwork.com/images/EC042017NF/155480s.jpg "Stampin' Up! Masking Paper [ 155480 ]")
![Small Blending Brushes [ 160518 ]](https://assets1.tamsnetwork.com/images/EC042017NF/160518s.jpg "Small Blending Brushes [ 160518 ]")
![Basic White A4 Cardstock [ 166781 ]](https://assets1.tamsnetwork.com/images/EC042017NF/166781s.jpg "Basic White A4 Cardstock [ 166781 ]")
![Basic White A4 Thick Cardstock [ 159230 ]](https://assets1.tamsnetwork.com/images/EC042017NF/159230s.jpg "Basic White A4 Thick Cardstock [ 159230 ]")
![Petal Pink A4 Cardstock [ 147009 ]](https://assets1.tamsnetwork.com/images/EC042017NF/147009s.jpg "Petal Pink A4 Cardstock [ 147009 ]")
![Petal Pink Classic Stampin' Pad [ 147108 ]](https://assets1.tamsnetwork.com/images/EC042017NF/147108s.jpg "Petal Pink Classic Stampin' Pad [ 147108 ]")
![Pool Party Classic Stampin' Pad [ 147107 ]](https://assets1.tamsnetwork.com/images/EC042017NF/147107s.jpg "Pool Party Classic Stampin' Pad [ 147107 ]")
![Soft Sea Foam Classic Stampin' Pad [ 147102 ]](https://assets1.tamsnetwork.com/images/EC042017NF/147102s.jpg "Soft Sea Foam Classic Stampin' Pad [ 147102 ]")
![Melon Mambo A4 Card Stock [ 119980 ]](https://assets1.tamsnetwork.com/images/EC042017NF/119980s.jpg "Melon Mambo A4 Card Stock [ 119980 ]")
![Melon Mambo Classic Stampin' Pad [ 147051 ]](https://assets1.tamsnetwork.com/images/EC042017NF/147051s.jpg "Melon Mambo Classic Stampin' Pad [ 147051 ]")
![Coastal Cabana Classic Stampin' Pad [ 147097 ]](https://assets1.tamsnetwork.com/images/EC042017NF/147097s.jpg "Coastal Cabana Classic Stampin' Pad [ 147097 ]")
![Lemon Lime Twist Classic Stampin' Pad [ 147145 ]](https://assets1.tamsnetwork.com/images/EC042017NF/147145s.jpg "Lemon Lime Twist Classic Stampin' Pad [ 147145 ]")
![Gorgeous Grape A4 Cardstock [ 147011 ]](https://assets1.tamsnetwork.com/images/EC042017NF/147011s.jpg "Gorgeous Grape A4 Cardstock [ 147011 ]")
![Gorgeous Grape Classic Stampin' Pad [ 147099 ]](https://assets1.tamsnetwork.com/images/EC042017NF/147099s.jpg "Gorgeous Grape Classic Stampin' Pad [ 147099 ]")
![Pretty Peacock Classic Stampin’ Pad [ 150083 ]](https://assets1.tamsnetwork.com/images/EC042017NF/150083s.jpg "Pretty Peacock Classic Stampin’ Pad [ 150083 ]")
![Old Olive Classic Stampin' Pad [ 147090 ]](https://assets1.tamsnetwork.com/images/EC042017NF/147090s.jpg "Old Olive Classic Stampin' Pad [ 147090 ]")
![Frosted Iridescent Dots [ 165766 ]](https://assets1.tamsnetwork.com/images/EC042017NF/165766s.jpg "Frosted Iridescent Dots [ 165766 ]")
![Basic Gray Classic Stampin' Pad [ 149165 ]](https://assets1.tamsnetwork.com/images/EC042017NF/149165s.jpg "Basic Gray Classic Stampin' Pad [ 149165 ]")
![Versamark Pad [ 102283 ]](https://assets1.tamsnetwork.com/images/EC042017NF/102283s.jpg "Versamark Pad [ 102283 ]")
![Metallics Wow! Embossing Powder [ 165678 ]](https://assets1.tamsnetwork.com/images/EC042017NF/165678s.jpg "Metallics Wow! Embossing Powder [ 165678 ]")


So love this technique. All three color waves are gorgeous, Helen.
Great technique Helen, one of my favourite techniques x