Today I am sharing with you some of my processes with you to hopefully help when you are taking photographs of your cards.
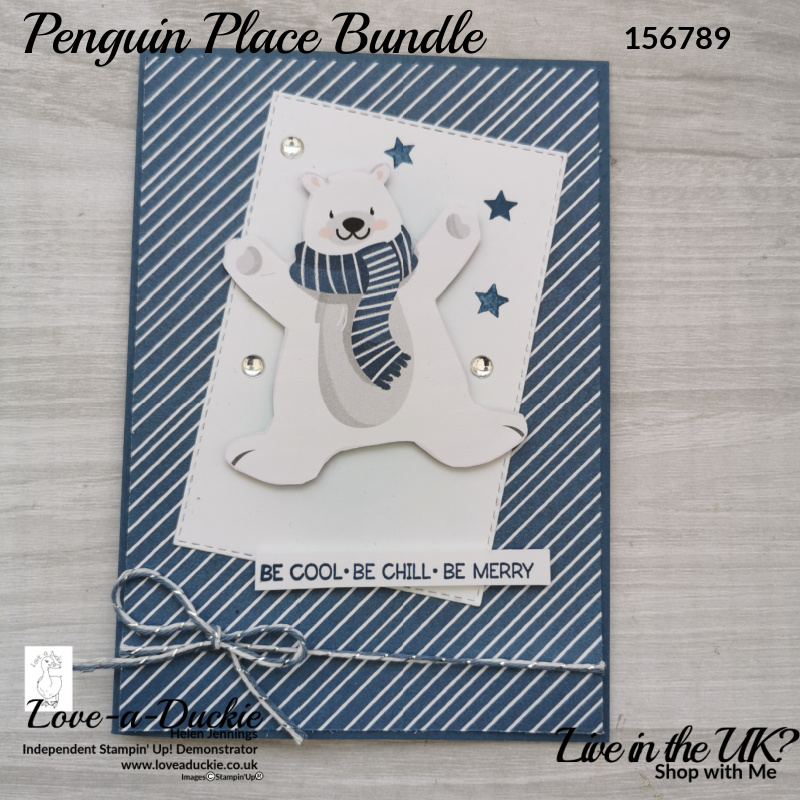
I’m obviously photographing cards for blog posts, social media and tutorials all the time. I am not an expert and I am continually learning and here I am sharing some of my learning with you.
You may not be needing photographs for any of the reasons I’ve mentioned, but perhaps you are taking part in a challenge, like the Chopped Challenge or Festive Friday, or you simply want to share what you have been making on a Facebook group. You want the photograph you take to do justice to all the hard work you have put in.
Setting the Scene
One of the most important things is your lighting. By far the best light is natural light. You don’t want to be in the full glare of the sun, but if possible be by a window, or even in the garden, but out of direct sunlight. My conservatory works beautifully for me. Move around the house until you find a spot that is bright, but doesn’t cast lots of shadows.
Think about how you want to photograph your card. Do you want it laying flat and take a picture looking down on it, or perhaps you want your card standing up. What do you want to be in the background? If you card is standing up, you need to think about what it is standing on as well as what is behind it. You don’t necessarily want to show everyone your pile of laundry, or messy desk. If your card is lying flat, perhaps stand a clear block underneath it, to lift it slightly. Particularly useful if you are photographing more than one card, or if you have used some props. You can take a picture of your card while you hold it, but you may want to wash the ink off of your hands first!
I have a selection of wood/stone effect Designer Series Paper stuck onto some thick card ( the type that comes in your paper packs). Alternatively it could be your kitchen worktop, bathroom floor, or perhaps some wallpaper. You can get creative with chopping boards, or home decor pieces. Decide on what is your style or colour theme.
The Camera
I use my phone for taking all my photographs. Modern smart phones have surprisingly sophisticated cameras and if you start exploring the settings , you will find lots of aids to taking good photographs. Of course all phones will be slightly different. My phone is a Huawei Android phone, but I’m sure if you hunt you will find similar settings on all phones.
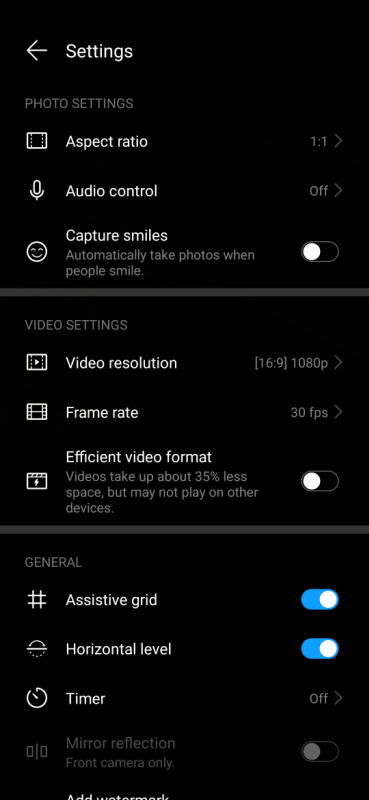
This is what comes up when I click on the settings button when I open up my camera on my phone and these are some of the settings that I have tweaked:
- Aspect Ratio – this defines what shape your photograph is going to be. The default is normally 4:3 – a rectangular photo. However, I have changed mine to 1:1, so my photographs are square. These are perfect for Facebook and Instagram and if you are joining in Challenges. This saves me having to crop my photograph into a square after I have taken it.
- Assistive Grid – I have turned this on. It gives me a grid on my screen when I am taking my photograph and helps with lining up and centring my card
- Horizontal level – this is another aid to positioning your card. If you are photographing a card that is standing up, it shows you when the camera is straight.
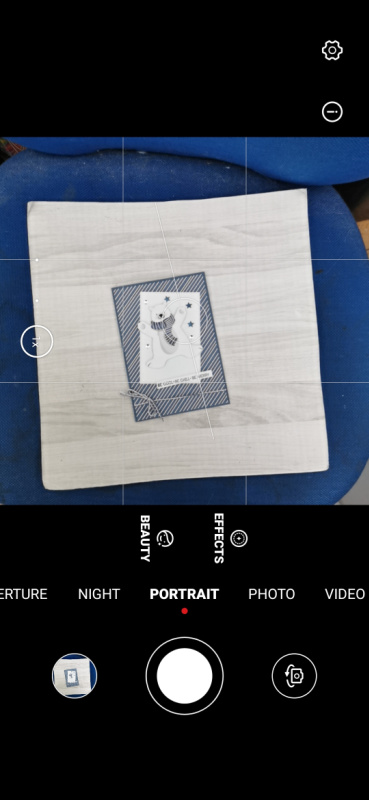
On my camera, I use the portrait mode to take my photograph.
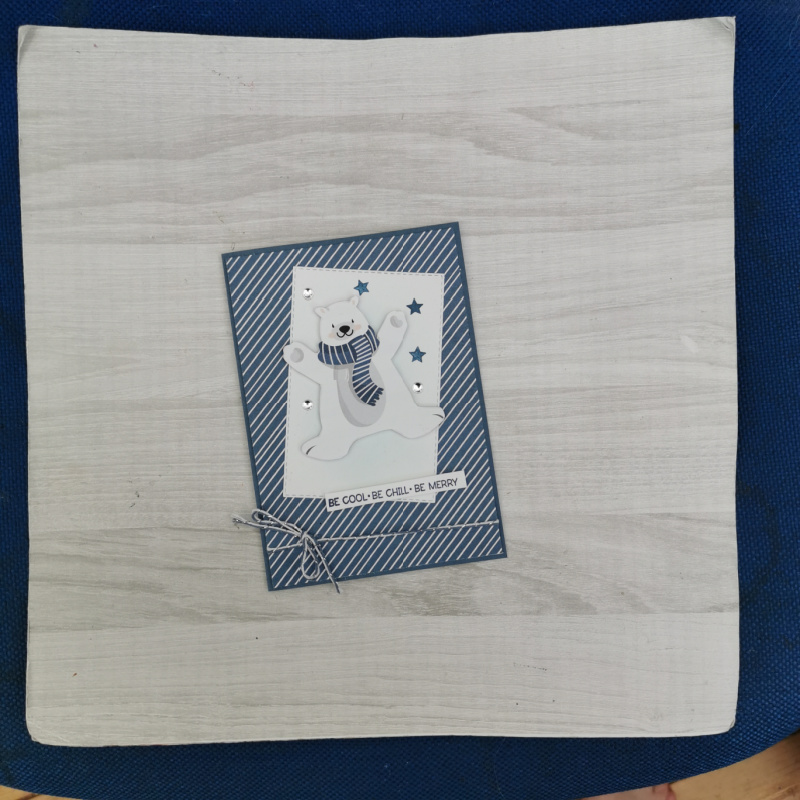
As you can see, my card is on my Designer Series Paper background resting on a chair in my conservatory. If you touch on the phone screen above the card, the camera will pinpoint that in its focusing.
You want to take a wider shot than you want as your finished photograph and then crop it afterwards.
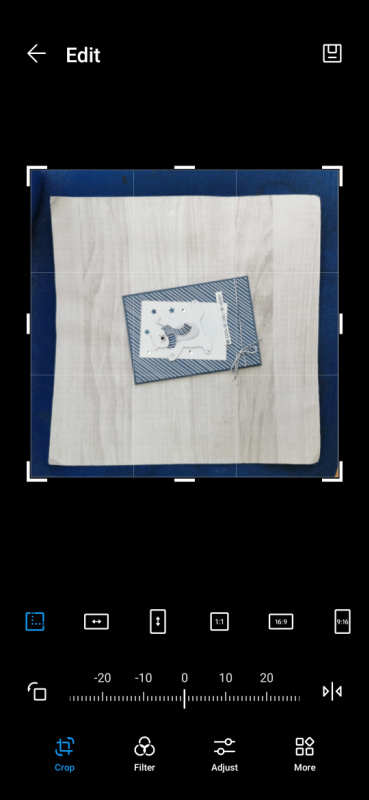
This screenshot shows my phone after I have taken the photograph. I need to turn it around and crop it. Both of these things I can do within the edit function of the phone. When I am cropping, I again select 1:1 so it maintains the ratio when cropping.
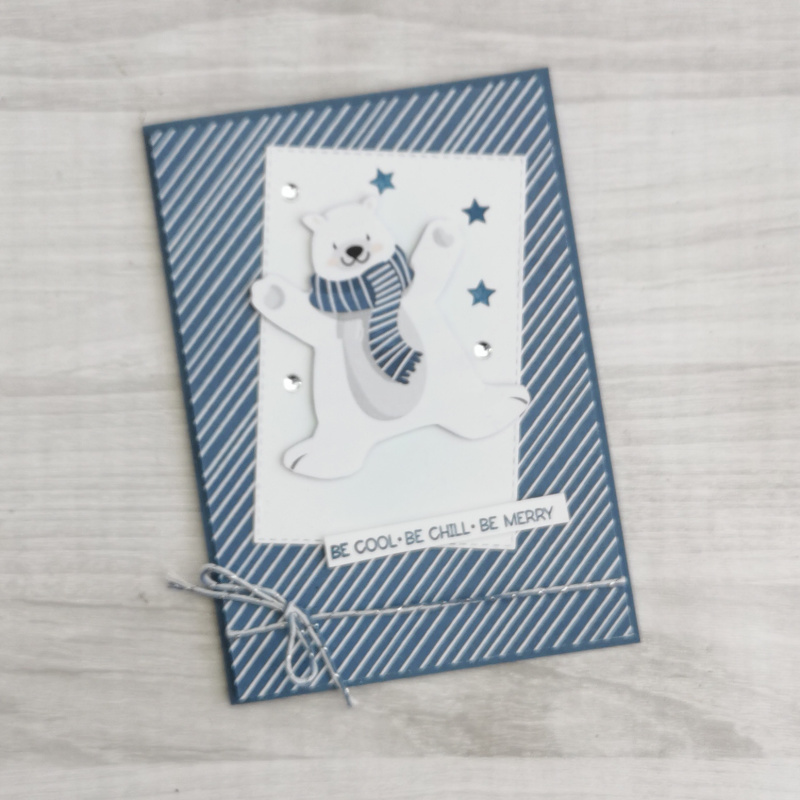
Here is my photograph after I have turned it and cropped it.
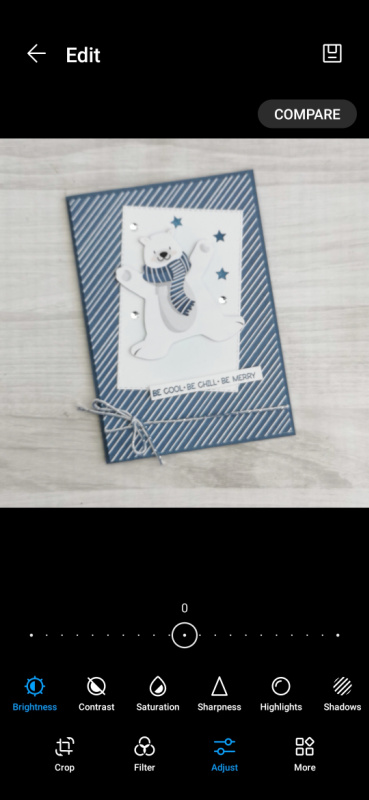
Still within your phone you will be able to adjust the picture. Don’t be afraid to play around with these settings. Your changes will only stick once you save them. You can make your picture brighter, intensify the colours, reduce shadows.
You may find that adjusting the picture on your phone gives you the picture you want. If you need, or want to edit your photographs further, you can always find computer programmes that enable you to do this. Photoscape is a popular programme with Demonstrators and it is free.
You may want to add a watermark to your photographs, or a way of people identifying that the project was created by you. There are again apps and programmes that will allow you to add watermarks, or you could simply print yourself a card with your details on and add it in the background of your photograph.
How Can I Help?
I hope these pointers have been useful and that you will start photographing and sharing your beautiful creations. Post them on Facebook and Instagram, add them to Pinterest and of course take part in some challenges.
Meanwhile stay safe and stay well
Helen xx
If you live in the UK, I would love you to choose me as your demonstrator.
- You can shop here or click on the images listed below.
- sign up for my newsletter to receive news and inspiration
- Find out more about joining my team to get a 20% discount on your craft supplies
- email me if I can be of any assistance.
- Make sure you use the current host code so I can thank you for your order.
- Anyone purchasing from me will receive a Tutorial Bundle as a Thank You.
