In today’s post I am going to be sharing how to create a Tuxedo Card.

The theme for this month’s Stampin’ Dreams blog hop is florals, so I thought I would go big and bright and use the Expressions in Ink suite to create a fancy fold card.
How to Create a Tuxedo Card
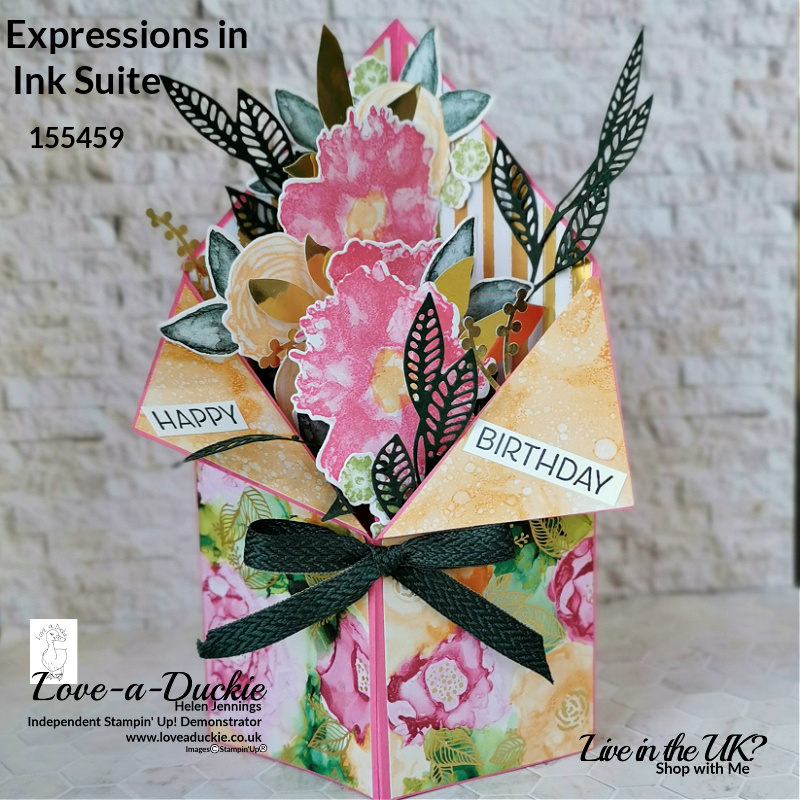
The Tuxedo Cards are very similar in make up to the folding box cards you can create, there are just some differences in the cutting and scoring and placement of the internal struts. They do make a real wow card.
A4 Cutting and Scoring.
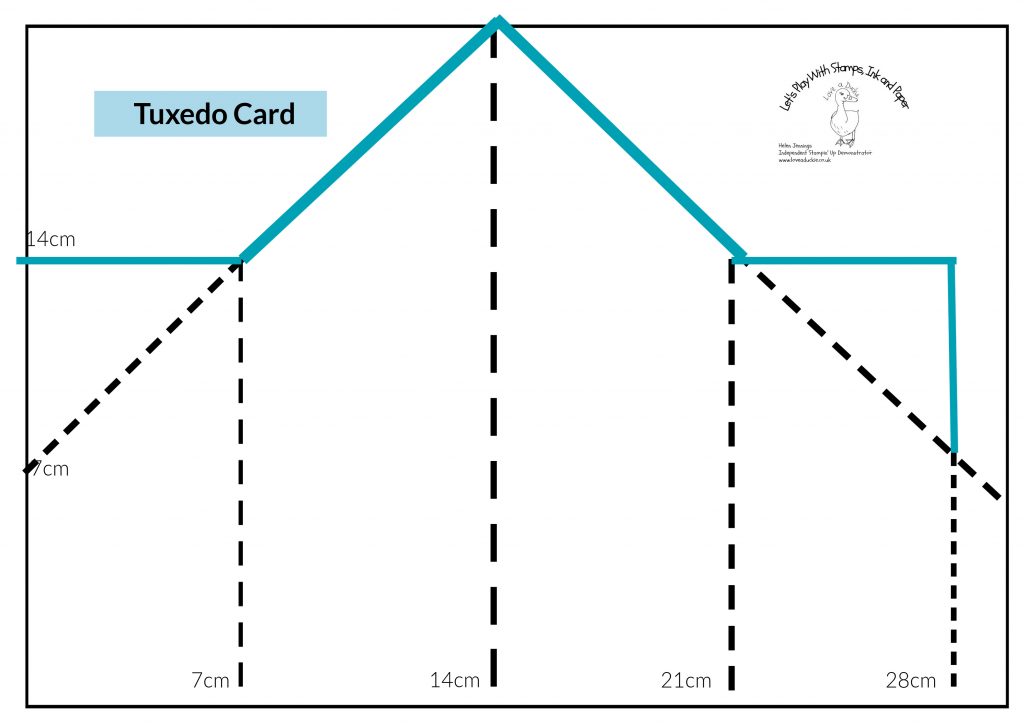
You need a full piece of cardstock to start with for this fancy fold. You score on the dotted lines and cut on the solid lines. The video below shows how I did this.
You will also need 2 pieces of cardstock measuring 9cm x 2cm, scored at 1cm in from each end for the internal struts.
Imperial Cutting and Scoring
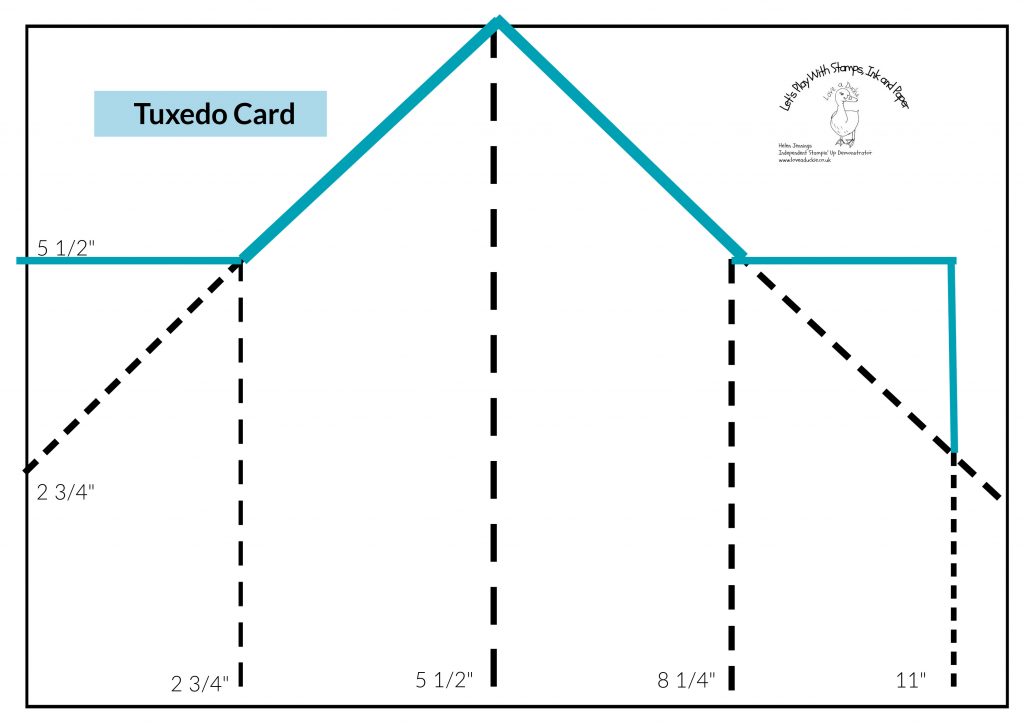
For Imperial sizing, you will need a piece of cardstock that measures 12″ x 8 1/4″. Your 2 strips of card will need to measure 3 3/4″ x 3/4″ scored at 1/2″ in from each end.
Scoring and Cutting The Tuxedo Card
All of the Designer Series paper is cut at 6.5cm or 2 1/2″ wide.
For each card you will need:
- 2x 15.25cm long pieces (12″)
- 2 x 13.5cm long pieces (5 1/4″)
- 1 x 6.5cm square (2 1/2″) cut in half on the diagonal to form 2 triangles.
Adding the Designer Series Paper & Inside Strips
All that remains is to add the floral decorations.
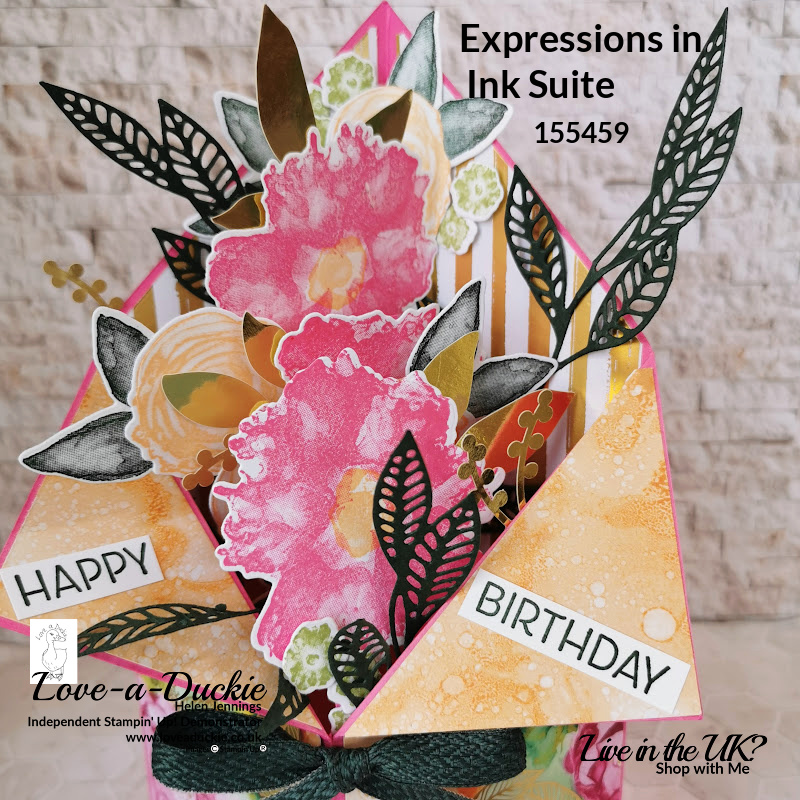
The elements were stamped and die cut using the Artistically Inked bundle. I also added some of the gold foiled pieces from the Ephemera pack.
I cut some narrow strips of Polished pink card and arranged the flowers on the top. The other end of the strips were then attached to the struts inside the card. More flowers were added to the front and back of the card to give a full arrangement of florals and leaves.
The Happy Birthday sentiment was stamped in Evening Evergreen ink. The dark colour helps it to pop against the bright paper.
Let’s Hop
I hope you have enjoyed my project. Do leave a comment if you can, because it certainly makes my day. Then it is time to hop around all the other projects

How Can I help?

This is certainly a very fancy fancy fold and I know just who I am sending it to. It does of course lay flat so that you can pop it in an envelope, or create a slim box.
This suite is one that is found in the Annual Catalogue and we can sometimes forget the gems that are there with the excitement of new products in the mini catalogues. The bold colours and images in the suite mean it is one you shouldn’t overlook.
Don’t hesitate to get in touch if I can help with your purchases, or if you have a crafty question.
Meanwhile stay safe and stay well
Helen xx
If you live in the UK, I would love you to choose me as your demonstrator.
- You can shop here or click on the images listed below.
- sign up for my newsletter to receive news and inspiration
- Find out more about joining my team to get a 20% discount on your craft supplies
- email me if I can be of any assistance.
- Make sure you use the current host code so I can thank you for your order.
- Anyone purchasing from me will receive a Tutorial Bundle as a Thank You.



What a stunning card! I can’t wait to try this fun fold!
Wow I love this Helen I am going to have to give it a try
Beautiful card Helen! I can’t wait to give this fancy fold a try!
What a beautiful card Helen, I must give this fun fold a try x
This is fantastic! I don’t think I’ve heard of this fold. Need to give it a try!
Beautiful Helen! I’m in line to make this one too!
Oh wow! I am speechless. This card is absolutely gorgeous and since you were kind enough to furnish excellent instructions, I see a CASE in my future! Thanks for the inspiration.
Wow, just wow! What an awesome bouquet of flowers! Fabulous work.
Helen, I LOVE this card. Thanks for the inspiration!
This is a new fun fold for me TFS!
What a great fold, love it 🙂
What a beautiful card, I love it x