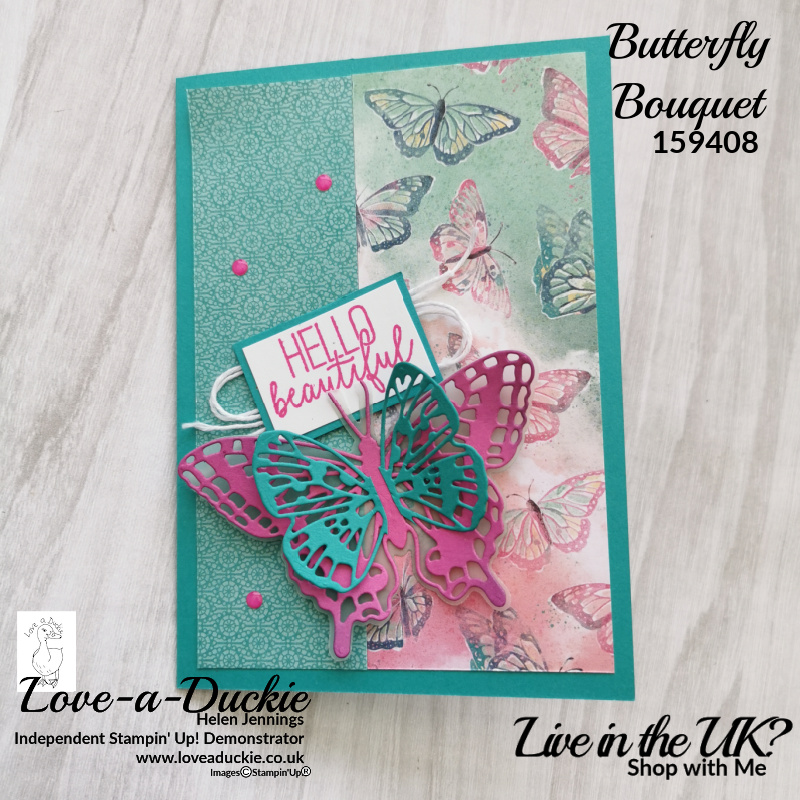
I have had great fun using patterned paper, die cuts and vellum to create today’s project.

Participants in Kylie and Bruno Bertucci’s Demonstrator Training program have got together to bring you lots of inspiration using the Butterfly Bouquet products from Stampin’ up! that are now available to customers. The collection consists of:
- A Stamp Set
- Dies
- 6″x 6″ DSP
- 12″ Natural Touch Speciality Paper
You can shop for them all by clicking the links at the end of this post.
My Project Using Patterned Paper, Die Cuts and Vellum
- Stamps: Butterfly Gala
- Tools: Brilliant Wings dies, Blender Brush
- Paper/Card: Butterfly Bijou DSP; Bermuda Bay: Magenta Madness; Basic White; Vellum
- Ink: Magenta Madness; Bermuda bay
- Embellishments: 2020-2022 In Color Enamel Dots; White Twine
- Adhesives; Multipurpose Liquid Glue; Stampin’ Dimensionals; Tear & Tape
| A4 Metric | Imperial Letter Size | |
| Bermuda Bay Card Base | 14.9cm x 21cm Scored at 10.5cm on the long side | 8 1/2″ x 5 1/2″ scored at 4 1/4″ on the long side |
| DSP | 14.4cm x 10cm Cut at 4cm on short side to create 2 strips | 5 1/4″ x 4 “ Cut at 1 3/4″ on short side to create 2 strips |
| Bermuda Bay | 4.5cm x 3cm | 17/8″ x 1 1/4″ |
| Basic White | 4cm x 2.5cm | 1 5/8″ x 1″ |
| Basic White | 13.9cm x 9.5cm | 5 ” x 3 3/4″ |
Instructions
- Fold card base along score line. Taking the DSP , stick the 2 strips to the card base, using opposite sides of the paper.
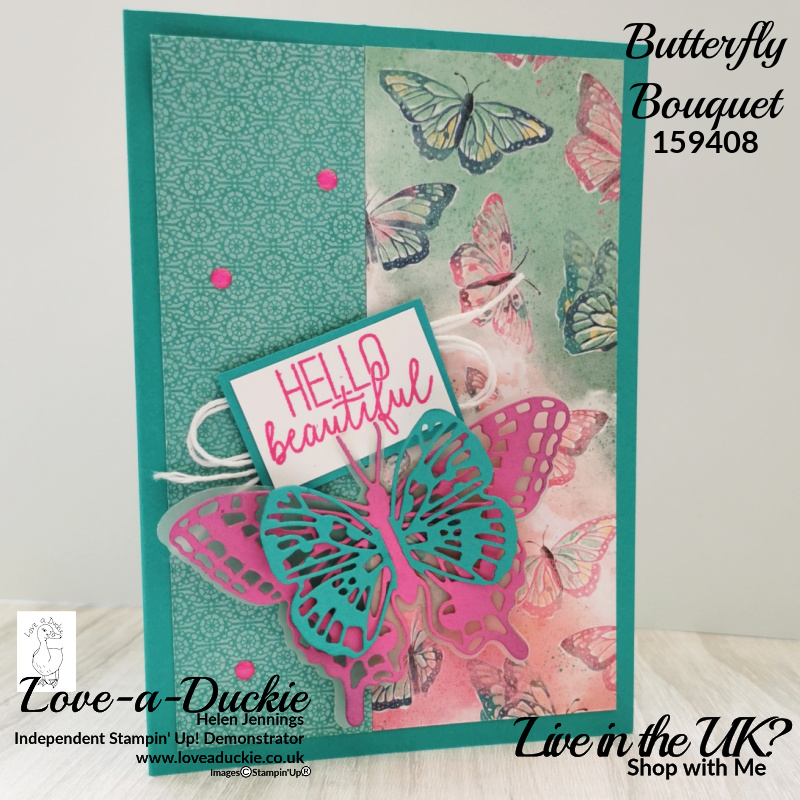
- Using the detailed butterfly dies, cut a large butterfly from Magenta Madness and a smaller butterfly from Bermuda Bay. Trim the wings away from the body on the smaller butterfly.
- Using the large die, cut the largest solid butterfly from Vellum. Using a blender brush, add Bermuda Bay ink to the butterfly. Also sponge some of the Bermuda Bay ink on the edges of the Magenta Madness butterfly. Stick the three butterflies together, attaching the large detailed vellum butterfly in the central body section and adding the smaller Bermuda Bay wings overlaying the larger Magenta Madness wings.
- Stamp the greeting from the Butterfly Gala stamp set onto the Basic White card using Magenta Madness ink. Mat it onto the Bermuda Bay card. Add a swirl of white twine to the back, before sticking the sentiment panel and butterfly to the card front.
- Finish with some Magenta Madness enamel dots.
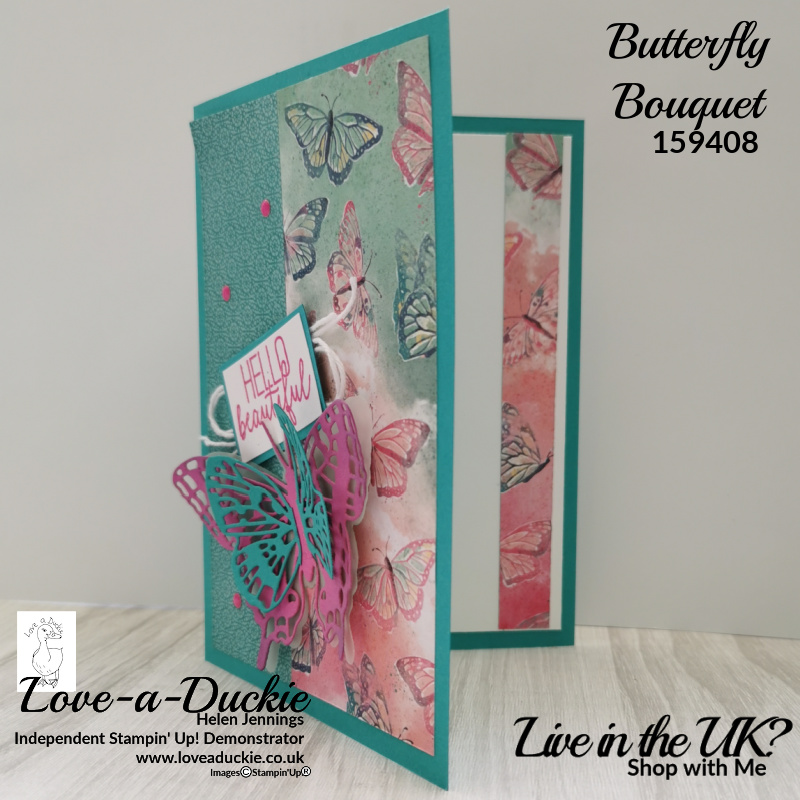
- On the inside of the card, add a Basic White panel of card, which has had a strip of the DSP added down the right side.
Let’s Hop
I hope you have enjoyed my project. Do leave a comment if you can, because it certainly makes my day. Then it is time to hop around all the other projects
How Can I Help?
I hope you have been inspired by all the gorgeous products in this hop. This beautiful group of products are available for you to buy now.
Stay Safe and Stay Well
Helen xx
If you live in the UK, I would love you to choose me as your demonstrator.
- You can shop here or click on the images listed below.
- sign up for my newsletter to receive news and inspiration
- Find out more about joining my team to get a 20% discount on your craft supplies
- email me if I can be of any assistance.
- Make sure you use the current host code so I can thank you for your order.
- Anyone purchasing from me will receive a Tutorial Bundle as a Thank You.









Helen this card is so gorgeous. Love the colours, textures and patterns and the detail inside. Thank you for taking part in our Demonstrator Training Blog Hop this month!
I love your butterflies. Gorgeous card.
Fabulous creation!!
Helen, this is a beautiful card!
I love your use of mixed wings to create the depth of the focal butterfly.
beautiful card Helen!! loved the color combo and how you made the butterfly! thanks for sharing.
Beautiful card Helen!
Great card, Helen. I love the layered butterflies – great idea! The bright colors are perfect for this Hello card.
Very pretty card!
Beautiful card!